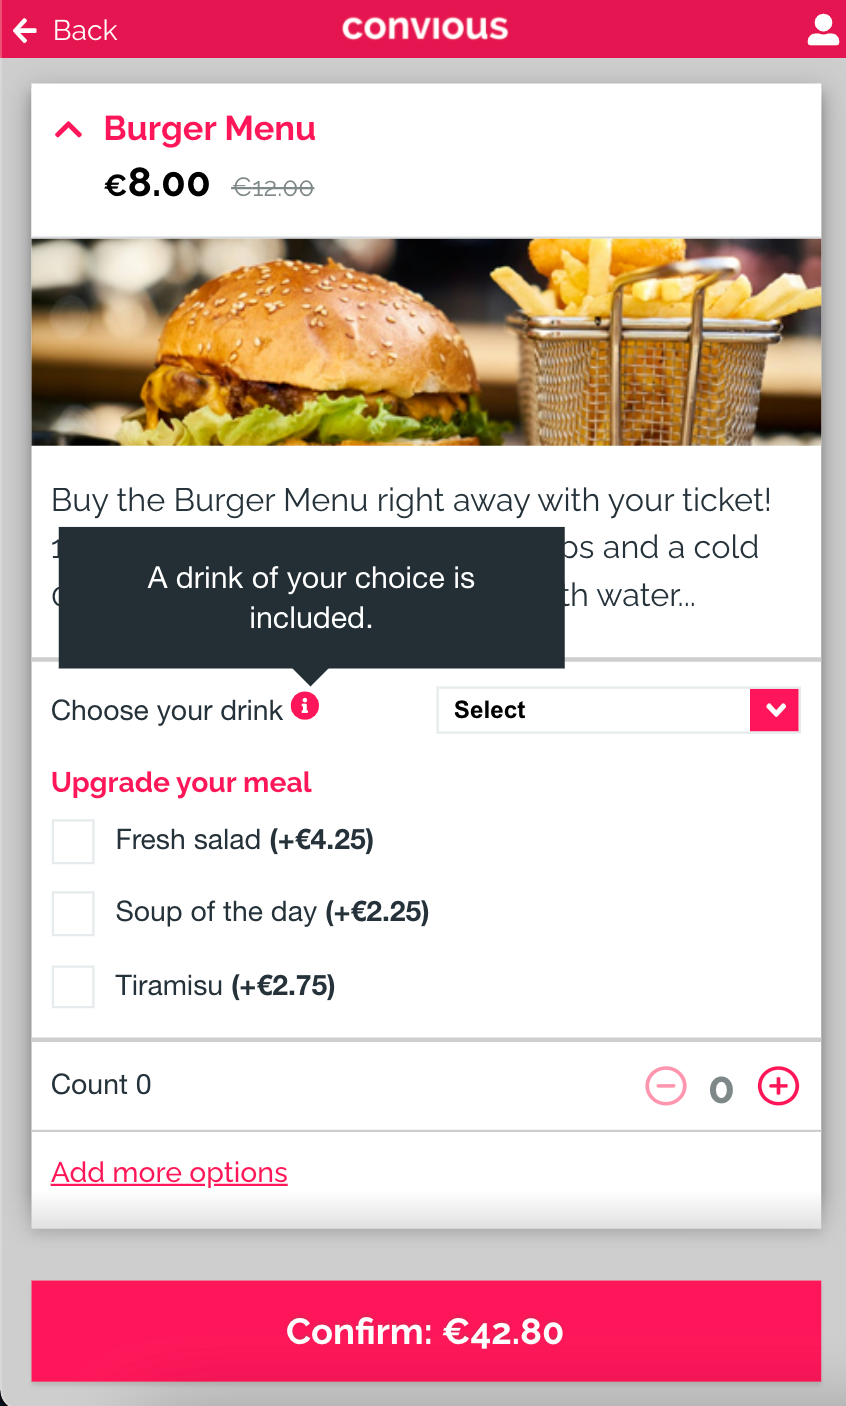
Do you have or want to add a menu as an upsell to any of your ticket flows and what your customers to be able to choose the drink already? Or do you have gear, other add ons or upgrades to your tickets or special events that you want your customers to choose from? Then Product Options are the right solution for you!
What can I exactly do with Product Options?
Product options allow you to add a list of selected products that show as a selection as part of an existing product.
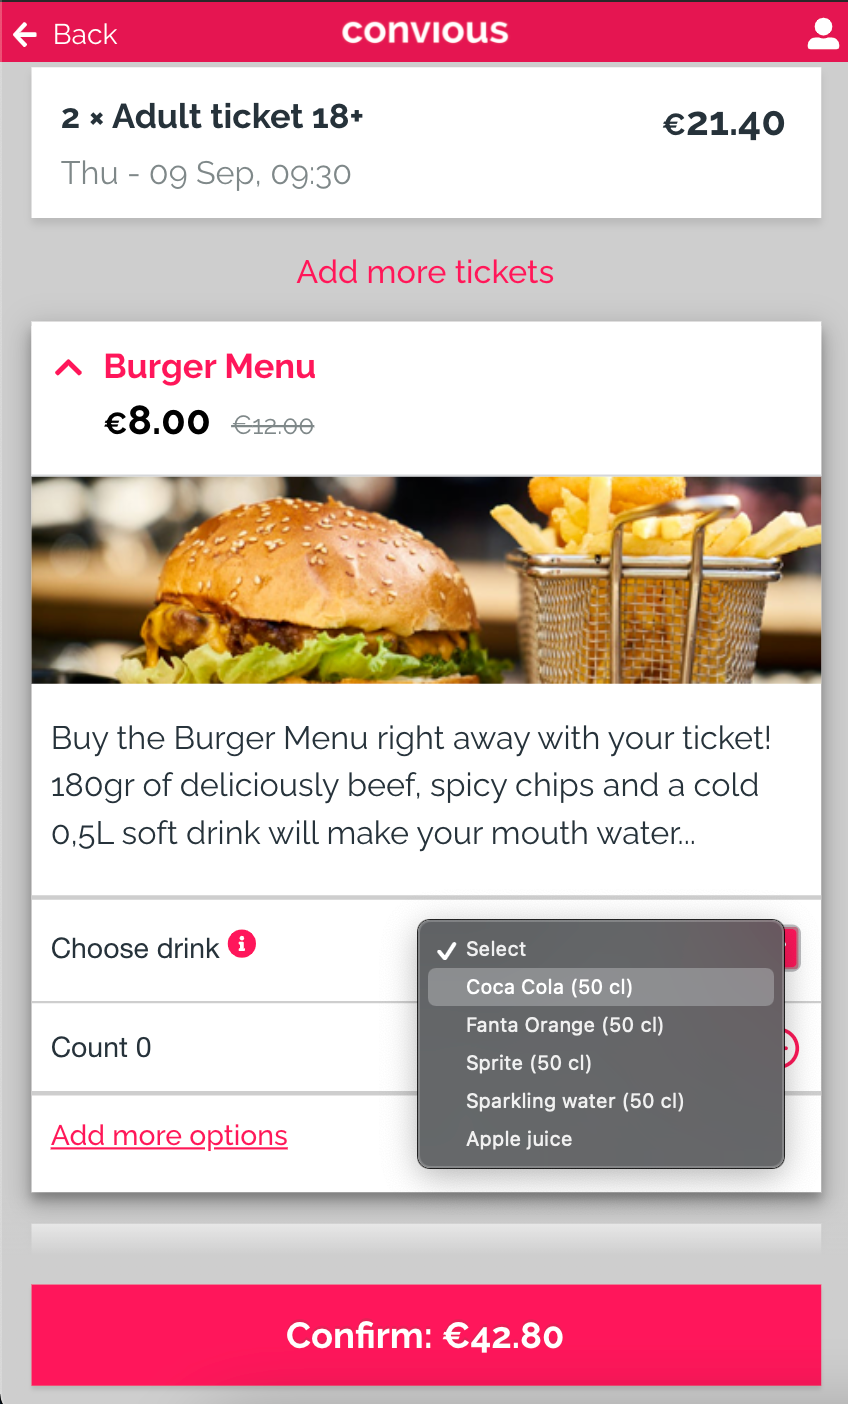
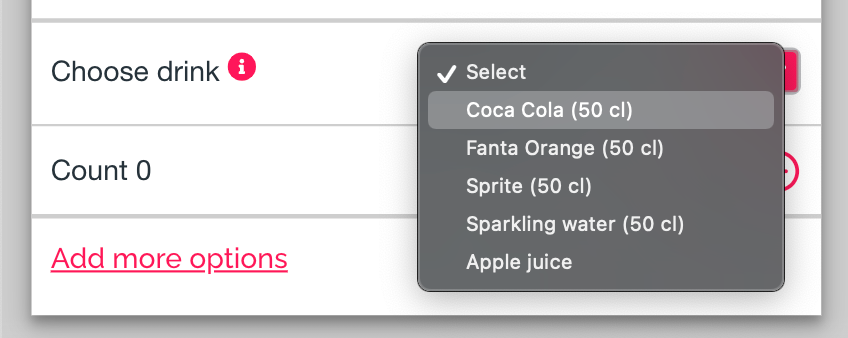
You can either have a drop-down list where only one item can be selected. Like the drink selection, you see on the right. →
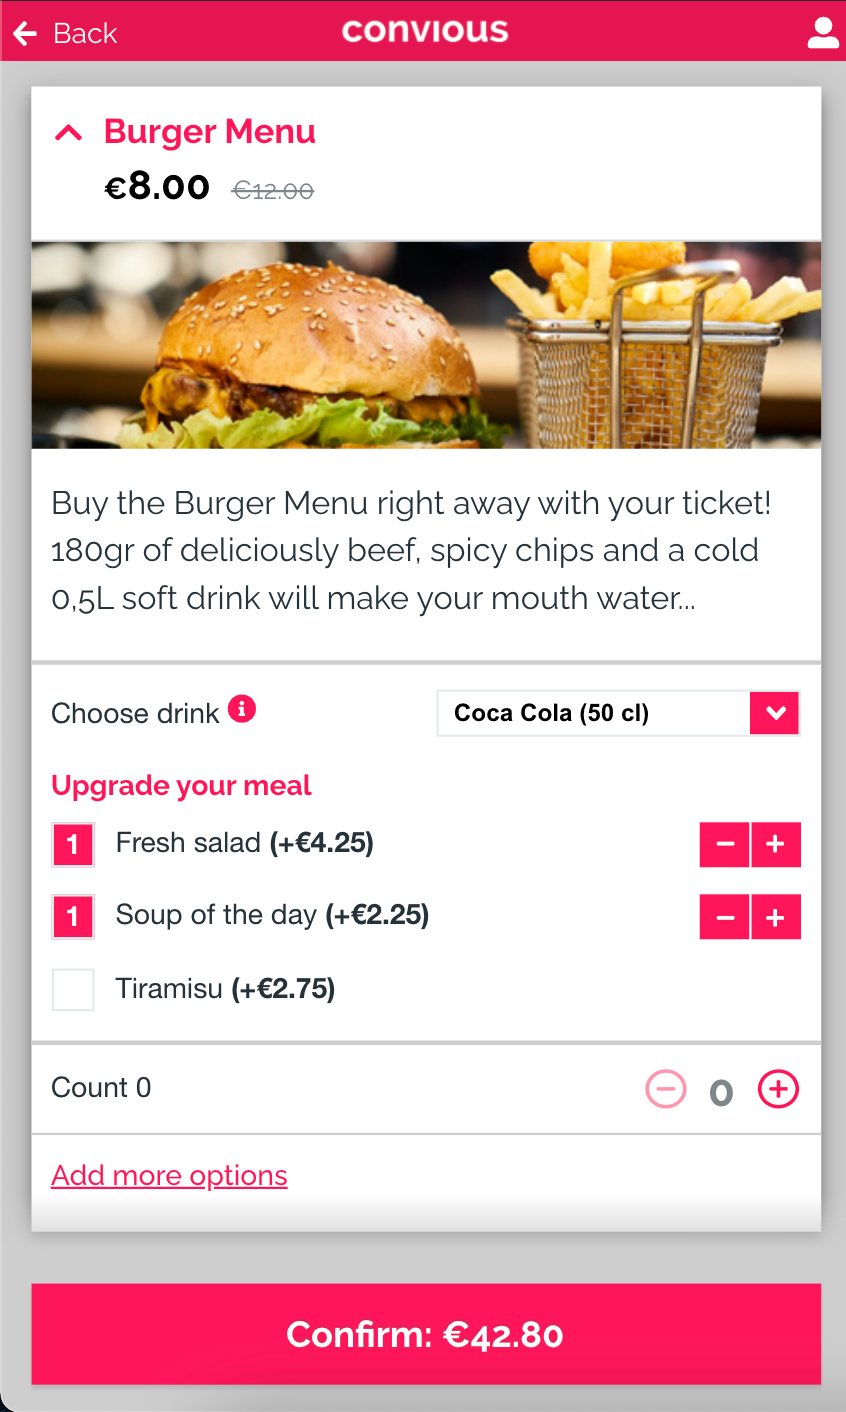
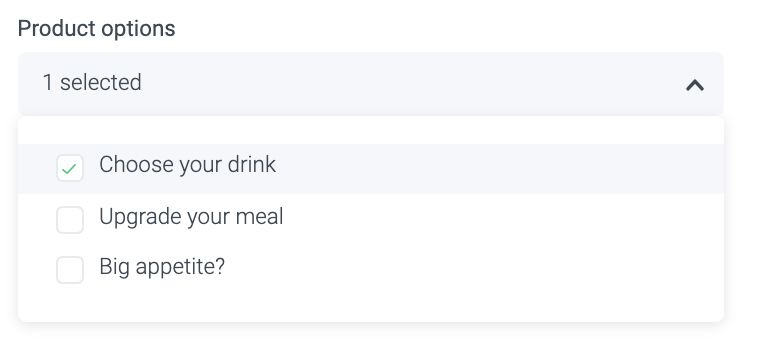
But you can also enable the customer to have the freedom to select multiple options. You can see what this looks like using the checkboxes below:
How to set Product Options up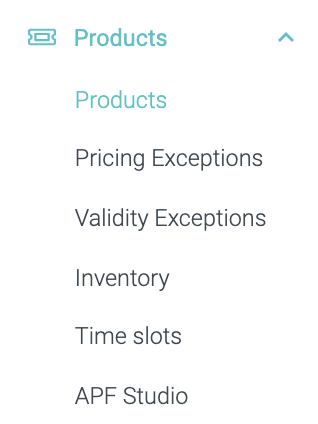
1. Navigate to your products overview page in your Products section. →
2. Go to Option Groups.
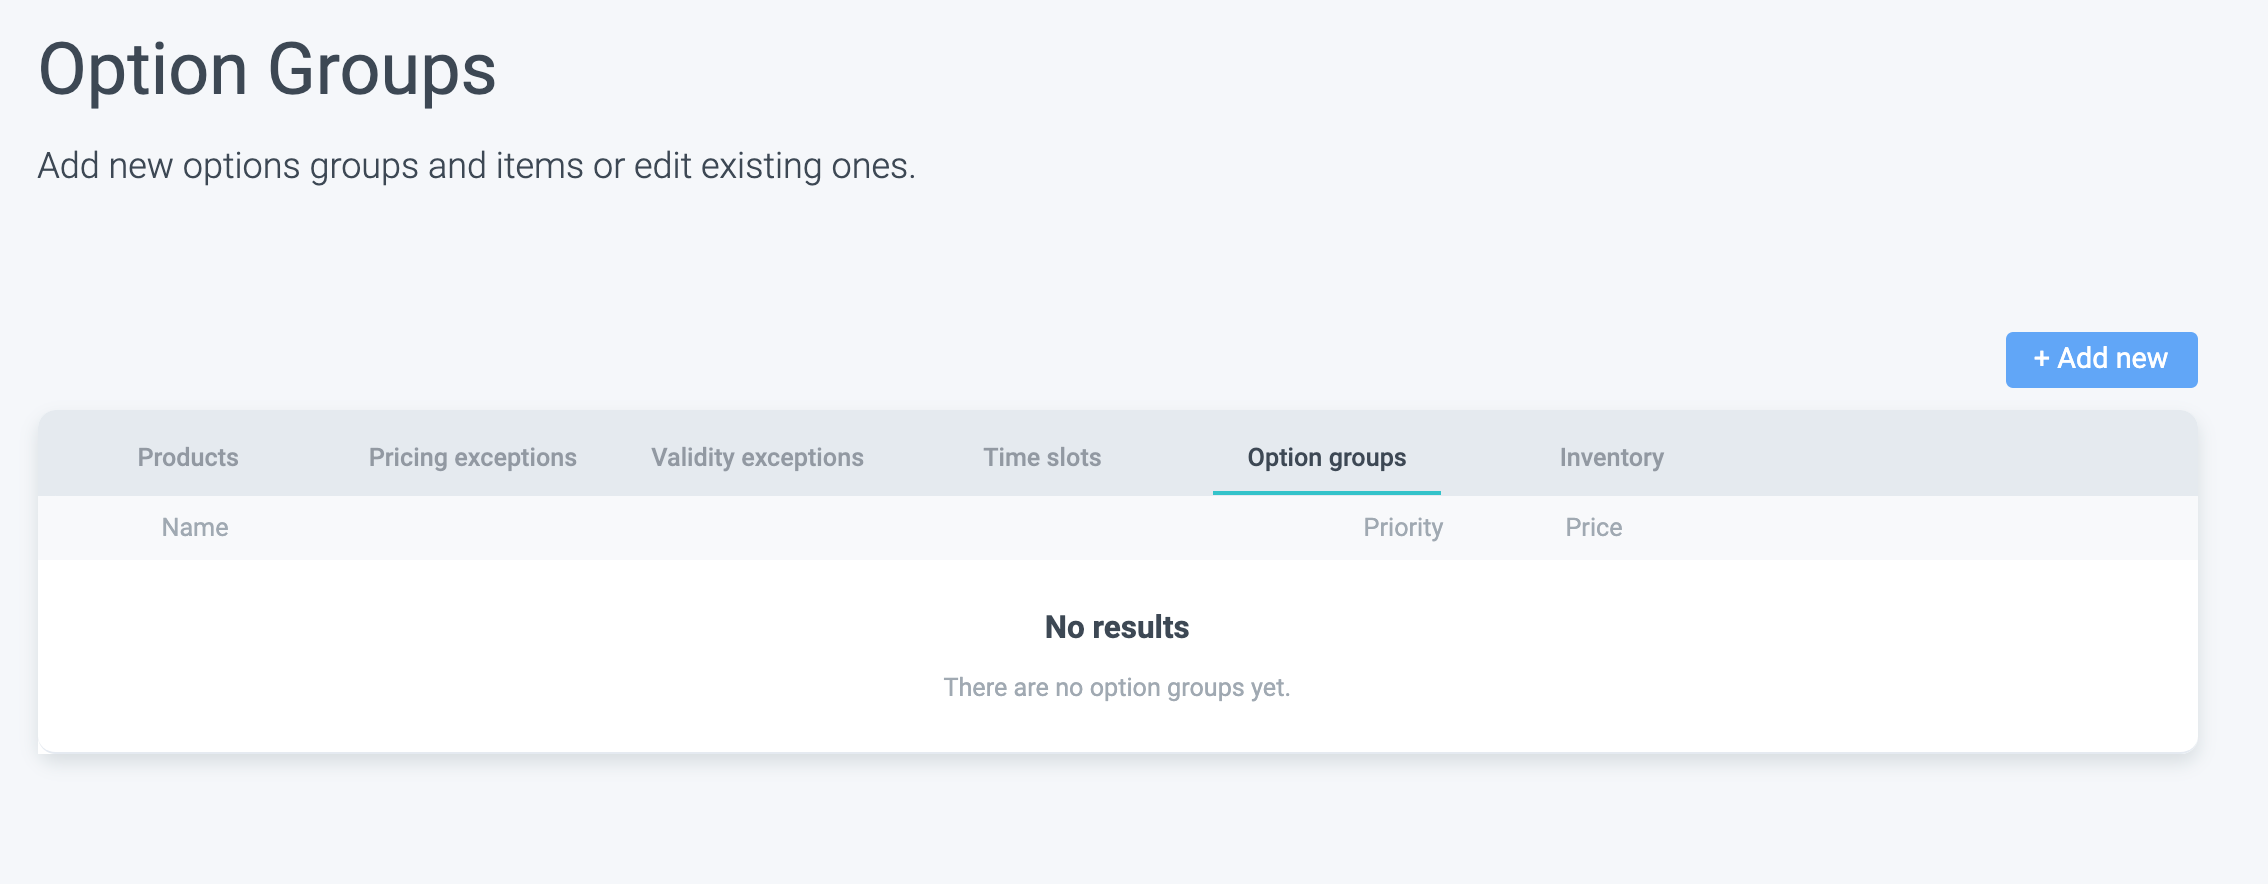
Now you will see the overview page of your of Options once you have them set up.
4. Time to add your first Option Group! Select +Add new to get started.
To clarify: Each option Group composes different article options that will appear in one list. This will become clearer as we move through this setup.
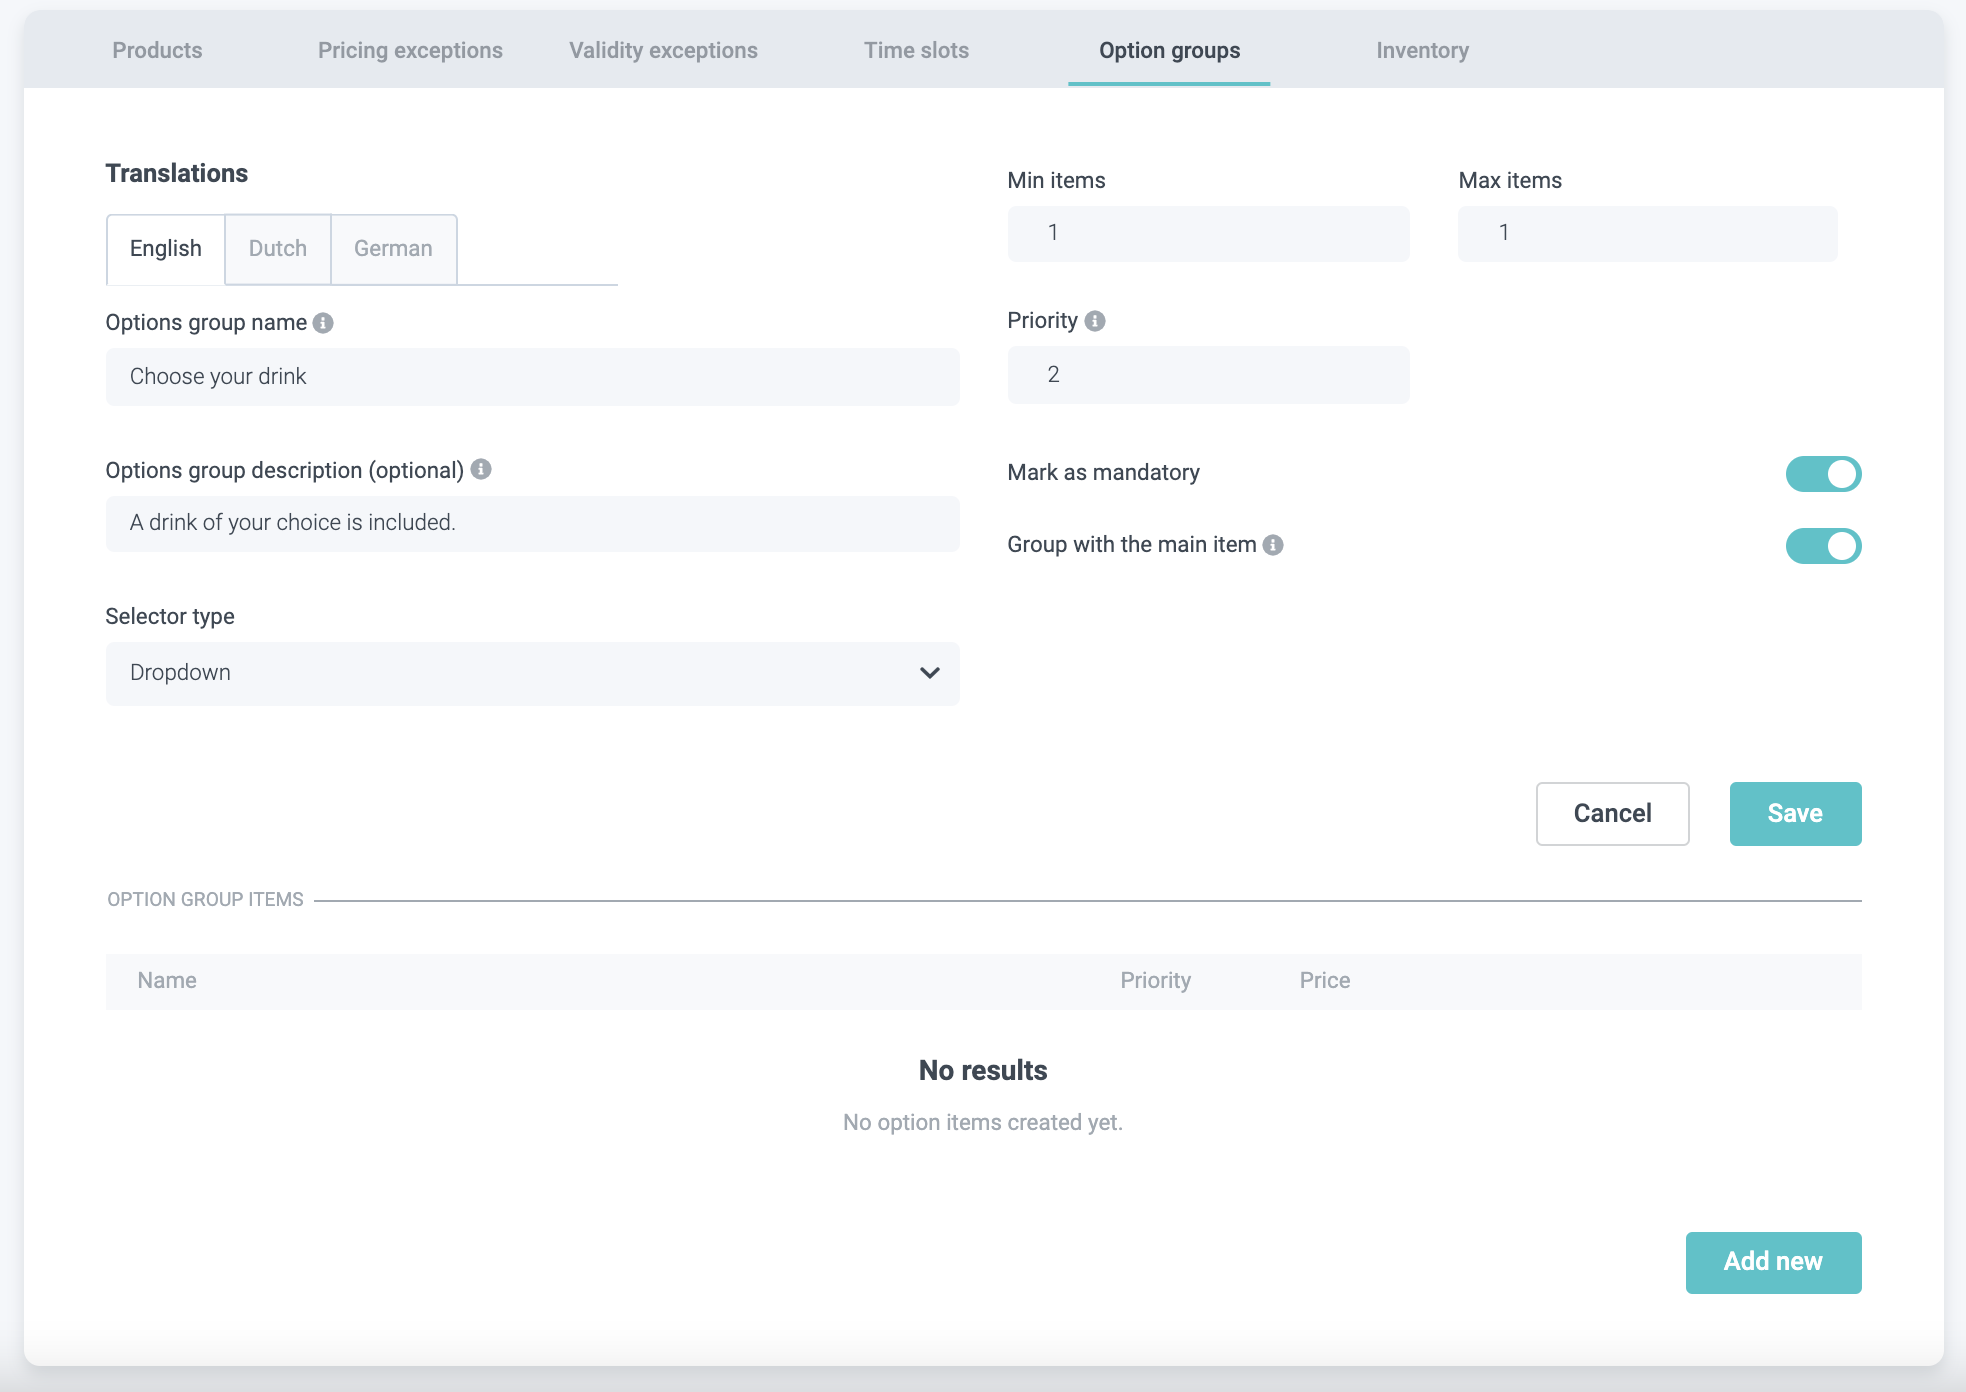
5. Set an Options group name.
Let's imagine we want to set up the drink selection list we saw at the top of this article. This would mean the Options Group would hold a different kind of drinks.
The name if this options group will appear in the Checkout as the title of the selection.
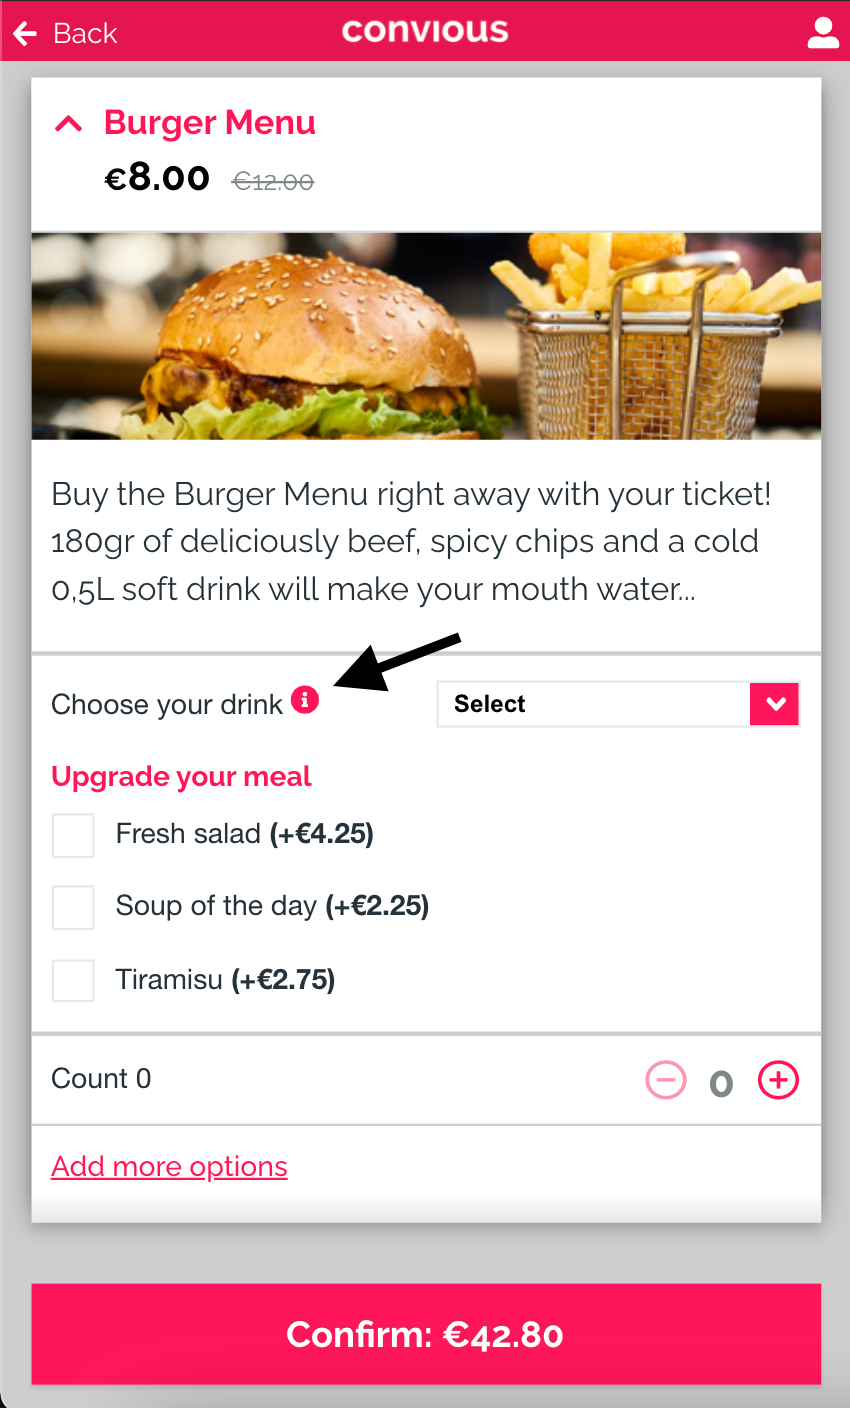
Thus, in our case, it could be something like: Choose your drink. →
Make sure to add all translations!
6. To help your customers understand, add an Options group description. This description will be visible as a tooltip when the user hovers over the info icon next to the Options group name →
7. Next up, you need to choose the best Selector type.
You can select between the following 3:
Drop-Down:
Checkbox:
Multiselect:
This selection type is the checkbox, including a more/remove button with a + and - that allows you to add more than one of the selected items.
As you may have already noticed, which selector type is best for your Options group depends a bit on the type of group you are setting up. This is why we will provide you with some additional examples.
Example A) Drink included
This is the example we have been following up until now. If you have a soft drink included in a menu, you probably only want it to be added once - one kind of drink. Therefore, the drop-down menu is the easiest, most intuitive and user-friendly setup.
Example B) Upgrade
When offering meals, you would probably want to provide the possibility to upgrade it with a choice of sides. In this case, it would be great to let them upgrade as many different ones as they'd like - the more, the merrier, right? Here the checkbox is the right solution to let them select multiple options.
Example C) Add on
Maybe you want to add to their experience with things such as additional guides, tours, toys or all! In this case, you would probably want them to upgrade as much as possible. Here Multiselect is a great solution as it allows to tick the checkbox and thus select not only multiple add on's but also add a count of how many they want per add on.
8. Further, you have to set the minimum & maximum amount of items that can be purchased.
If we continue with the drink example, you would want to limit the min. & max. to 1.
If you have upgrades or add on's you can make it dependent on your preferences.
9. Next, you have to decide on Priority.If you have several options activated for your product, such as the drinks and the meal upgrade, you need to decide in which order they should be displayed.
Please note: The option with the lowest number will be displayed on top.
Here we have the drinks first, then the upgrades. →
Thus, we set priority for the drinks to 1.
10. Now, define whether the option you are setting up is mandatory or not.
If you enable it by switching the toggle to the right, then you make the option selection mandatory, and your customer can not continue the flow without selecting an option.
For upgrades and add ons which are optional, you need to disable this switch.
11. Now, you need to think of how you want your option to be displayed on your connected kitchen displays. Clearly, this is only relevant for you if you have the Convious Buttler (or other interfaces) connected to your kitchen via Mobile Food Ordering through Tap, for example.
By enabling the toggle, the items will be grouped with the main item when being displayed on your kitchen interface. By disabling, the items will be shown separately.
If you do not have a kitchen interface connected, you can disregard this toggle.
12. Now that you have your group - hit save.
After you hit save, you will be guided back to the Option Groups overview page.
You will see that you have no actual options attached to the group yet.
13. To add the options or products, in this case, the drinks, to the group, you can either:
A) Go back and edit the group by clicking on the pencil icon and then scroll down to the Option Group Items section and choose Add new.
or B) Add a new option to the group by choosing the + icon.
Now you can add the option by walking through the product info you should know very well from setting up products.
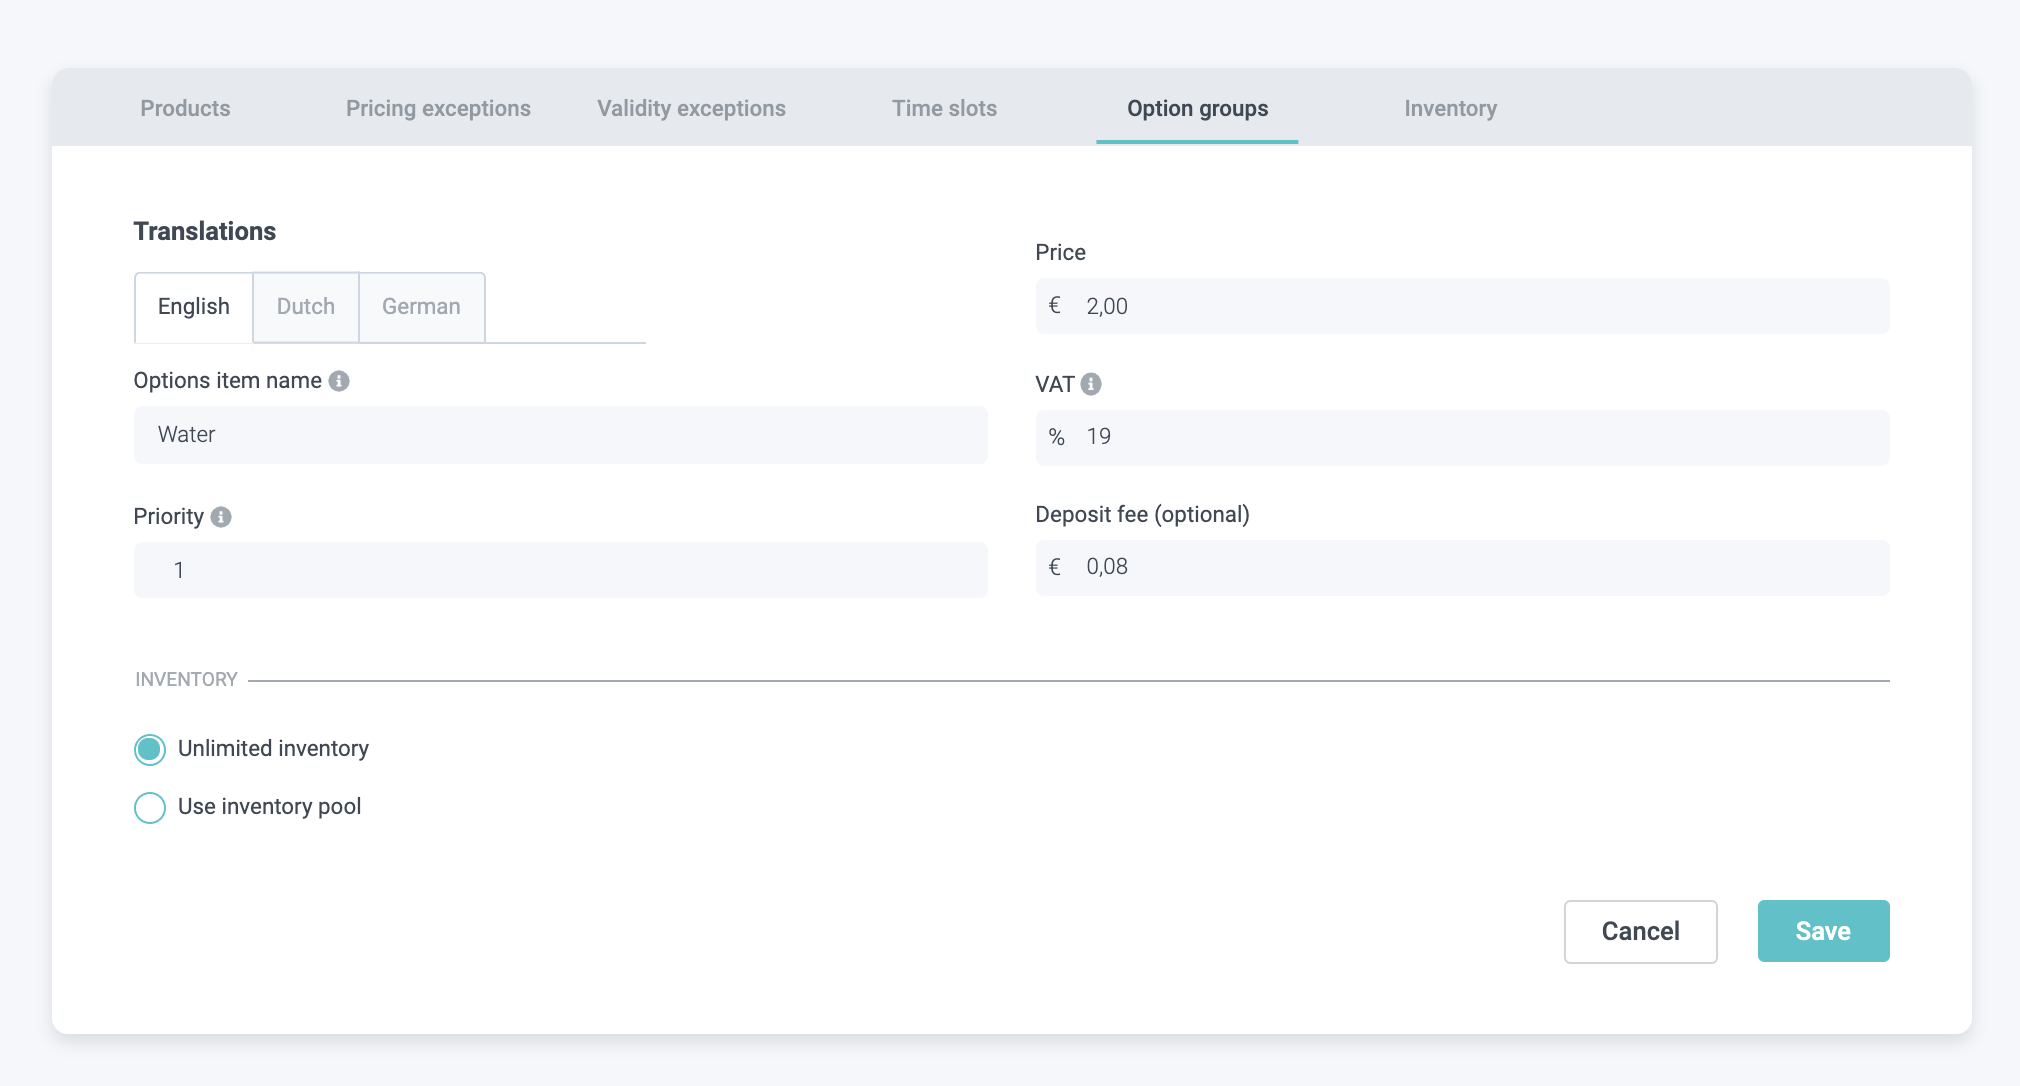
14. Give the Option a name - remember: this is the name that will be displayed in your Checkout.
15. Set a priority: If you have several options, the priority defines the ore Ron which they are displayed. Here as well, the option with the lowest number will be displayed on top.
16. Set your price. The prices of your options will always be static.
17. Next, make sure to set the right Value Added Tax. This field will always take the global VAT number you have set for your account. You only need to enter a value if you want to override it for this options item.
In this example, the account VAT is 19%
18. Further, you can set an optional deposit fee that can, later on, be returned to the customer when returning the item. For a bottle of water or any drink, in many countries taking such a deposit is mandatory (Statiegeld, Pfand, etc.).
19. Lastly, it is time to connect your inventory pool to limit its availability or set it to unlimited if that is the case.
Since water should always be available, we leave the inventory unlimited. With other drinks, you might only have a certain amount, and therefore, you need to set up a separate inventory pool for it in case you haven't yet.
To do so:
19 a) Head to Inventory
19 b) Add new
19 c) Give it a name
19 e) Set Default Capacity number & inventory type.
Here, you can deploy different setups based on your actual product inventory and workforce:
- Set only venue capacity: If, for example, you have only 20 burger buns for today so you cannot make more than 20 burgers today (venue capacity = 20).
- Set both gate and venue capacity: If you have 20 buns for today (venue capacity = 20), but you also have workforce limits — your employees can make only 5 burgers every hour (gate capacity = 5)
- Set only gate capacity: If you have an unlimited amount of buns, but your employees can make only 5 burgers every hour (gate capacity = 5).
20. In our case, we now have all settings set and hit Save
Now you have added the first option to your group!
Please repeat steps 13-20 for all the options you want to add to this group!
21. Lastly, go to the product settings of the product you want your options group to be connected to.
In our example, this is an upsell in our dated ticket flow.
22. Scroll all the way down to →

24. Make sure to hit Save & your options group is live!
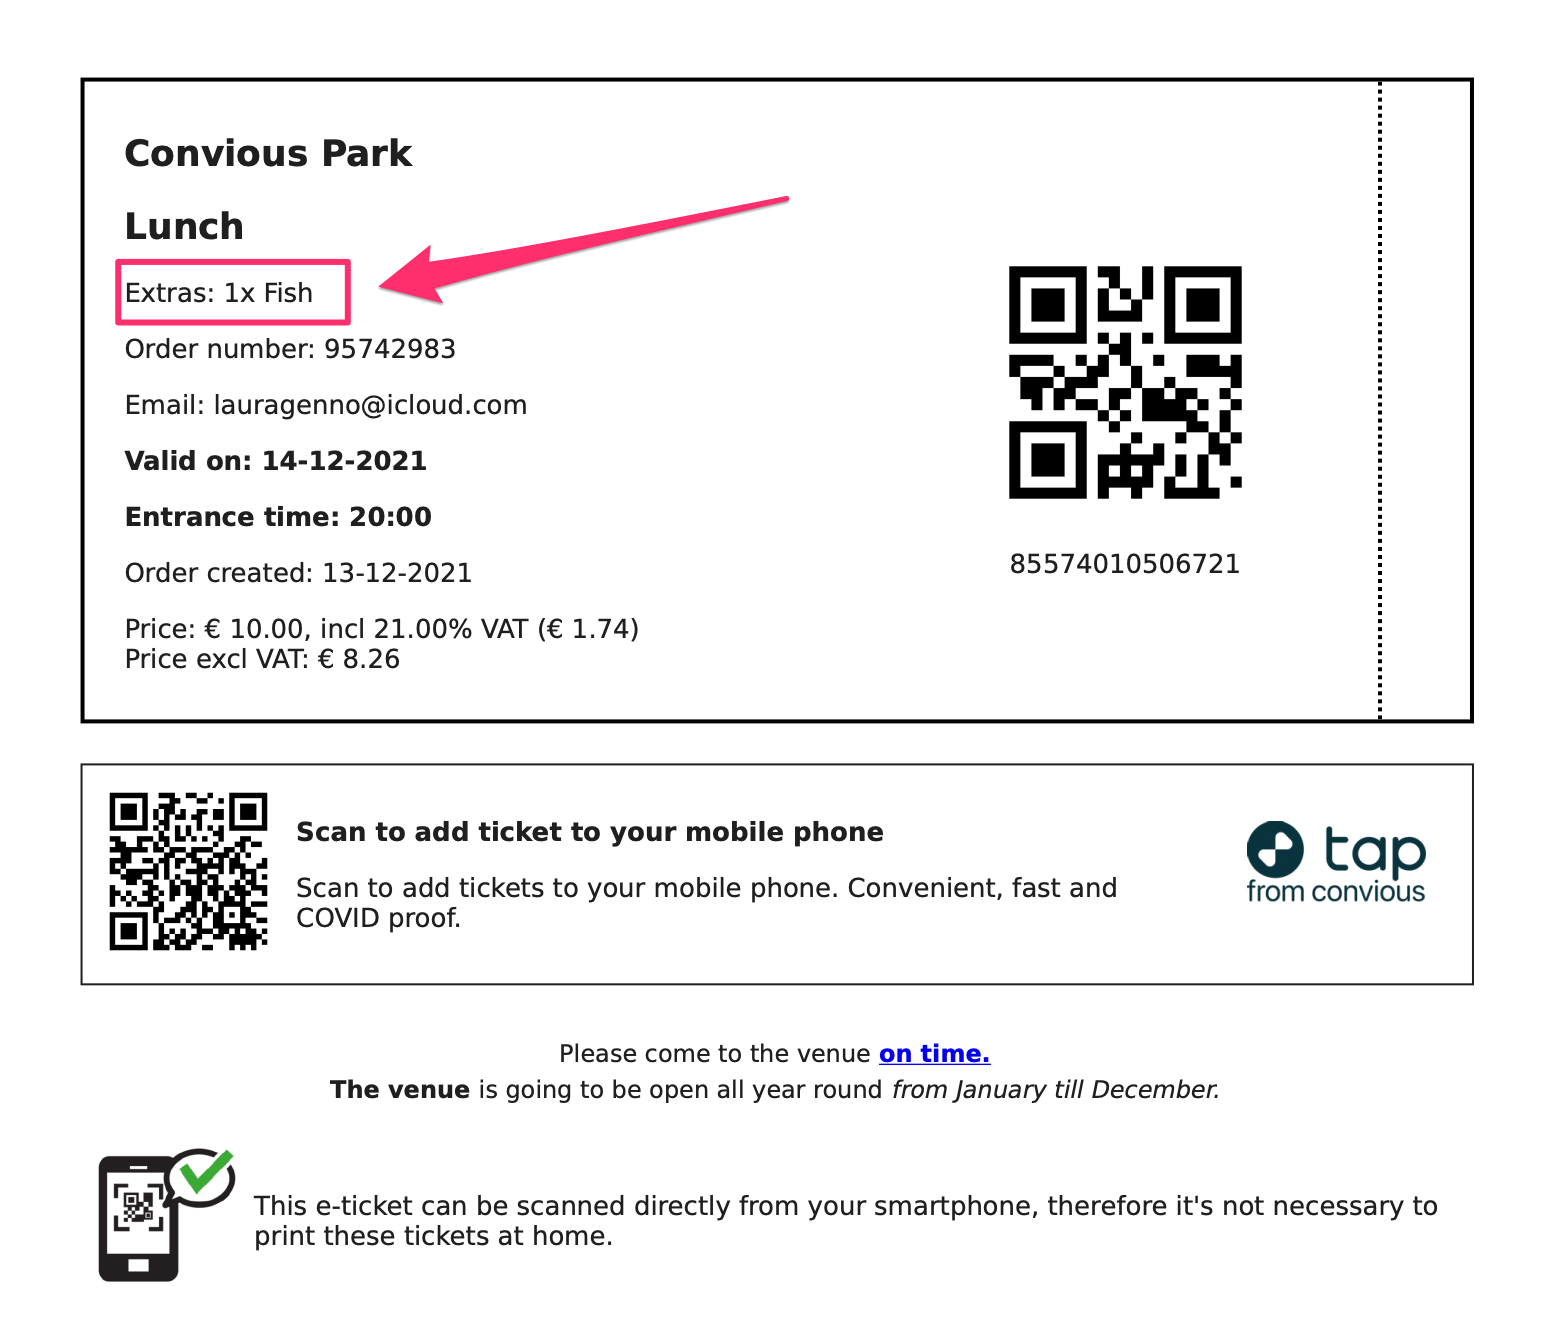
Article options will also be visible in the ticket template:
How to see the selected Product Options in the Orders
With just a few clicks!
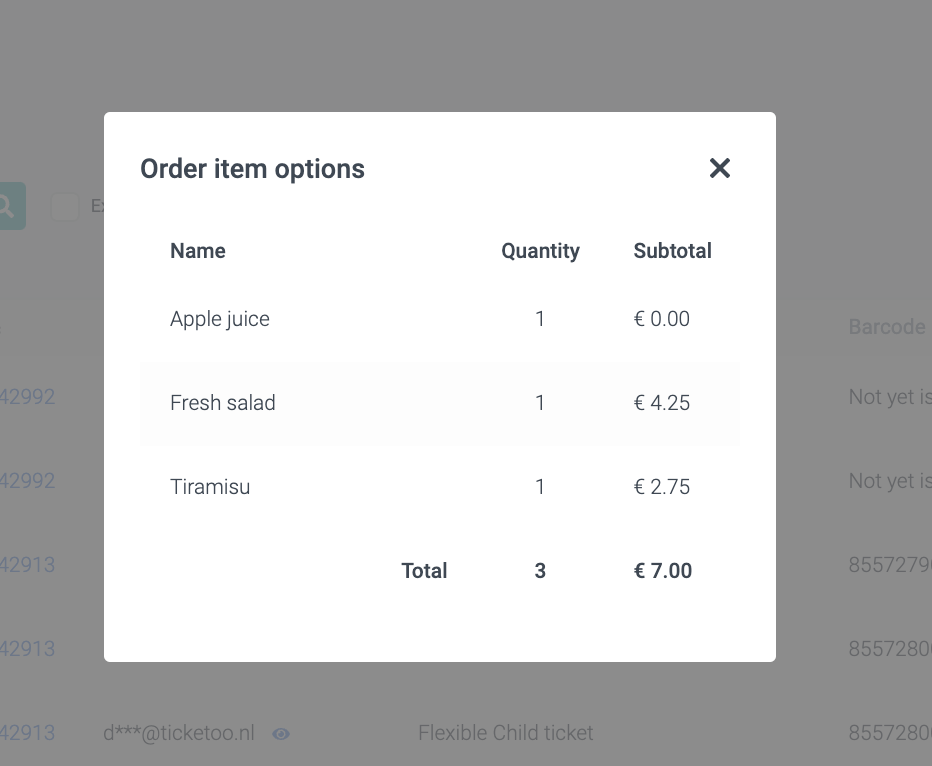
All you got to do is to navigate to orders details. Here you will see a new column called Options.
If a product does not include options, you will see N/A = Not Available - but if a product does include options, you will have the ability to expand and view these options with one click.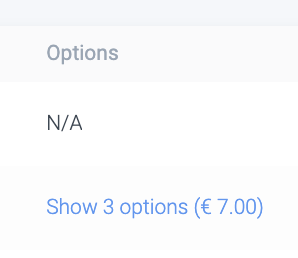
→ → → → → → → → →

