Why is this important?
What counts for the categories also counts for the products: without them, you can not take your offerings live. A category alone without any products within is not enough. Setting up a product right consists of several small but important components you need to understand to ensure you can setup new products and update your existing ones at all times without making mistakes that may impact your sales.
Understanding the distinction between a 'product' and a 'category'.
1.1. What is a 'product'?
To put it simply, your products are the things or services which your venue offers and that you sell online. Products are an integral part of your online ticket shop as they conform your online offering.
1.2. What is a 'Category'?
You have to think of Product Categories as folders that contain products inside of them. So Product Lists or Categories are simply lists of products that belong to the same category grouped under one same "folder".
E.g: You can have two different product categories: One for Dated Tickets (containing day passes and/or flexible tickets, etc.) and another one for Undated tickets (containing season passes an/or member cards).
The Ticket types:
Single ticket: Single visit ticket - can be used for dated and undated tickets.
Reservation: A ticket that will be issued as part of a reservation flow.
Upsell: This will be upgrades and add-ons to the main products that can be purchased just before completing the payment/reservation products.
Season/Yearly ticket: This will be your season passes.
Multi-visit ticket: This includes those tickets you might offer that can be used to book multiple visit dates (2-day tickets, etc.).
Bundles: This is to set up bundle articles
Vouchers: If you sell gift vouchers or products alike, this is the type to choose.
Service: Choose this type for the products that are used to change the date with the self-service reservation changer.
Donation: Choose this to implement a donation flow into your checkout.
Loyalty card: Depending on your setup this type integrates your loyalty cards.
Food & Beverage: This is for Food & Beverage products
The Product Pricing types:
- Static (Fixed price)
- RTP (Real-Time Pricing)
- NYOP (Name Your Own Price)
- Upsell
⚠️ TO KEEP IN MIND:
- Once you select the product's pricing type and save your changes, you won't be able to change its pricing type again. If you would like to do so after you have already saved the product, you'll have to create a new one from scratch, re-fill all fields and then change the pricing type, so if you want to avoid this, make sure you save your products' pricing type mindfully.
Product priority
- Set the first product that shows under the categorie on priority type 10
- Then the second product on proiority 20 and so on.
Setting a Booking Horizon & Release time

For example, suppose you set the booking horizon to 7 days and sell tickets for a special event on July 4. In that case, your product will be available on June 28. but not be available earlier = 6 full days before the visit/event date + the date itself.
The release time defines the number of days from today the product will not be available to buy in the Checkout. You can use this to set up a category or product that you want to make available for purchase in the future. It is important to know here that today (the day you are setting it) counts as one of those days.
For example, if you set the release date to 2 days and today is July 1, your product will release (go live) and be available to your customers in 2 days (July 3.).
If you want neither of these settings enabled, you can leave it blank to disable it.
Tickets per customer: This will limit the amount of tickets per buyer. So if you dont want more tickets in one order being purchased then 20, set the maximum to 20.
The default values are 1 as the minimum and 10 as the default maximum. While you always have to have at least 1 or higher as the minimum, you can edit the maximum to your preference
In case you want to re-read what we have gone over and learn more about how to navigate on your products page or how to duplicate products, head over to the Full Guide of creating Categories & Products.
Time to practice
Add a new product, click yourself through the various settings and maybe test it in a category and product that isn't live for your customers to understand the setup.
Check yourself
- Do you know how to connect your product to the right categories?
- Do you know the different product types?
- Do you know how to set up your product for Tap?
- Are you familiar with the various pricing types?
- In case you have an integration, do you know how to add external ID's?
- Do you know you why it is so important to connect the right inventory & barcode pool?
Not sure if you got them all right? Check your answers.
Check yourself answer sheet
-
Do you know how to connect your product to the right categories?
Connecting Products with Categories and vice-versa is done from a 'Product' level, not from a 'Category' level. If you want a product to be inside a specific product category, make sure you have created such category beforehand (you can follow the steps mentioned above on how to create a new category).
When editing or creating a new category you will see the option as shown in the example to the right:
-
Do you know the different product types?
Single ticket: Single visit ticket - can be used for dated and undated tickets.
Reservation: A ticket that will be issued as part of a reservation flow.
Upsell: This will be upgrades and add-ons to the main products that can be purchased just before completing the payment/reservation products.
Season/Yearly ticket: This will be your season passes.
Multi-visit ticket: This includes those tickets you might offer that can be used to book multiple visit dates (2-day tickets, etc.).
Vouchers: If you sell gift cards or products alike this is the type to choose.
Service: Choose this type for the products that are used to change the date with the self-service reservation changer.
Donation: Choose this to implement a donation flow into your checkout.
Loyalty card: Depending on your set-up this type integrates your loyalty cards.
Food and beverage: This is selected for products which are part of the F&B Checkout flow. For more information go to: https://www.convious.com/mobile-food-ordering -
Do you know how to set up your product for Tap?
If Tap is enabled for you, you need to determine here how your Tap channel shows the product.
Single-use Ticket: A ticket that can only be used once. (Dated tickets, flex/undated tickets, etc.)
Multi-use tickets: Tickets that can be used multiple times (Season passes, Loyalty passes, '10ner Karte' or 'Strippenkaart' etc.) -
Are you familiar with the various pricing types?
- Static (Fixed price)
- RTP (Real Time Pricing)
- NYOP (Name Your Own Price)
- Upsell
⚠️ TO KEEP IN MIND:
Once you select the product's pricing type and save your changes you won't be able to change it's pricing type again. If you would like to do so after you have already saved the product you'll have to create a new one from scratch, re-fill all fields and then change the pricing type, so if you want to avoid this, make sure you save your products' pricing type mindfully. -
In case you have an integration, do you know how to add external ID's?
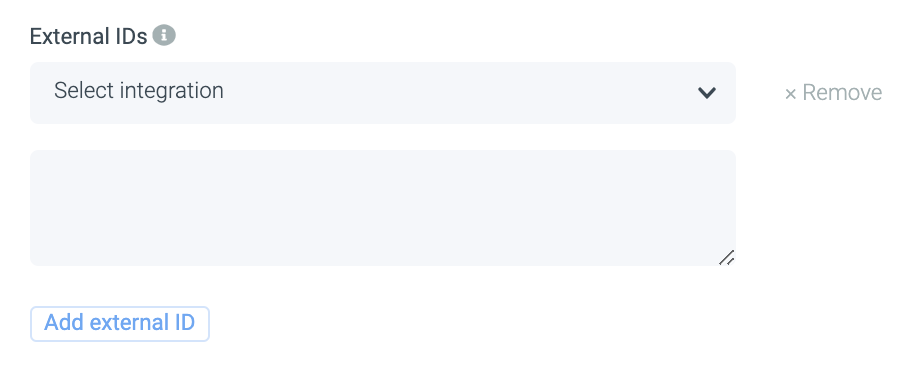
For new as well as editing exiting products you will see this section in your editing page:
1. Click Add external ID
2. Select the Integration from the drop-down menu
3. Add the External ID (separate by pipes: | )
-
Do you know you why it is so important to connect the right inventory & barcode pool?
Connecting the right barcode pool is crucial because this will determine whether your tickets will be scanned for the correct products. If you connect a child ticket barcode pool to the adult ticket, at your gate you will check in the wrong products.
Connecting the right inventory pool is crucial because this directly connects to your set the capacity limits.
Your inventory is where you can view and edit the capacity of your venue. Depending on your set-up, this capacity can be divided into 2 categories:
Read more about inventory here.
Gate Capacity: The amount of visitors or tickets to be sold per time slot.
Venue Capacity: The amount of simultaneous visitors.


