Why is it so important?
Letting your guests change their reservations is beneficial for you because:
- it takes the heavy lifting of your customer support by reducing time, effort and money spent on simple tasks such as changing dates on orders,
- it gives the customer more control over their visit,
- it gives you a real-time overview of your actual visitor numbers by reducing no-shows,
- the rescheduling fee will act as an upsell that will generate additional revenue!
As you can see, there are many good reasons to set this up.
Great news:
Since December 2021, we have 2 different date change possibilities. The date Change per order where a full order will be rescheduled, and the partial date change where individual tickets within the order can be rescheduled.
What it will look like:
Have a look at this example:
1. A guest visits your venue's website.
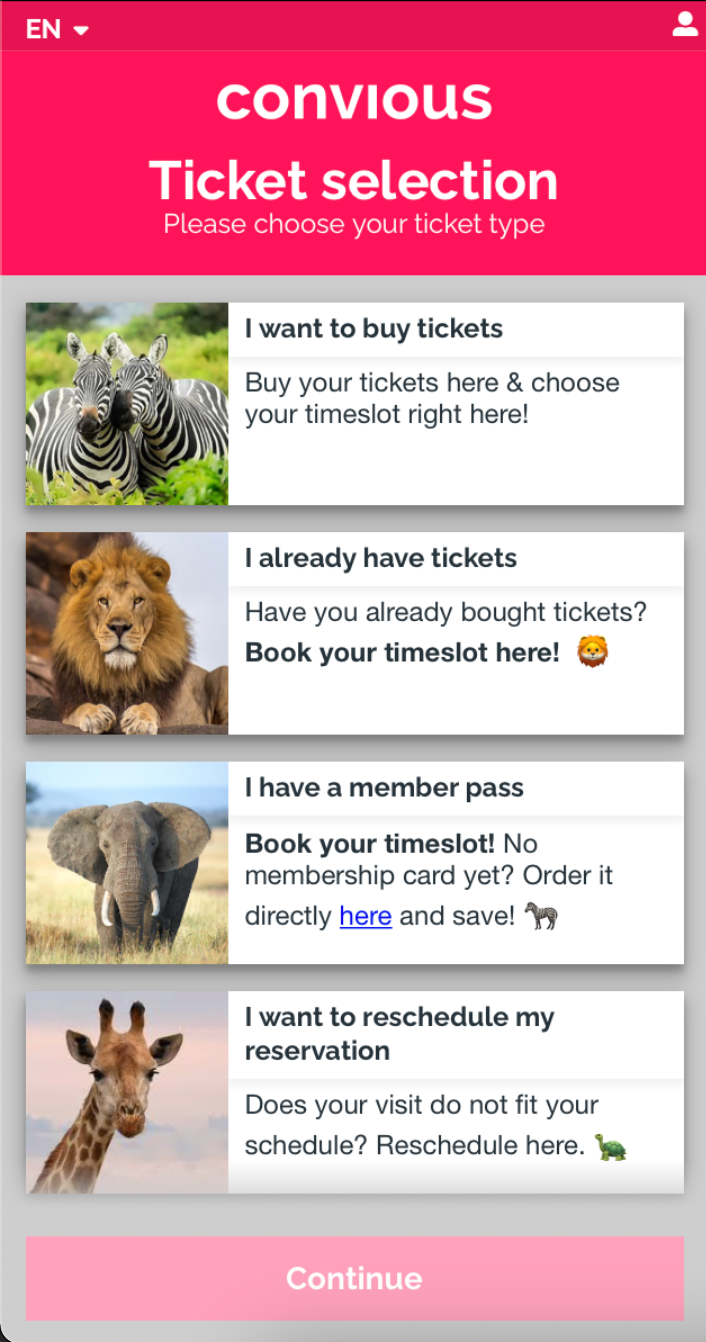
2. The guest navigates to the trigger button to view the Convious Checkout and scrolls down to select ‘I want to reschedule my visit.’
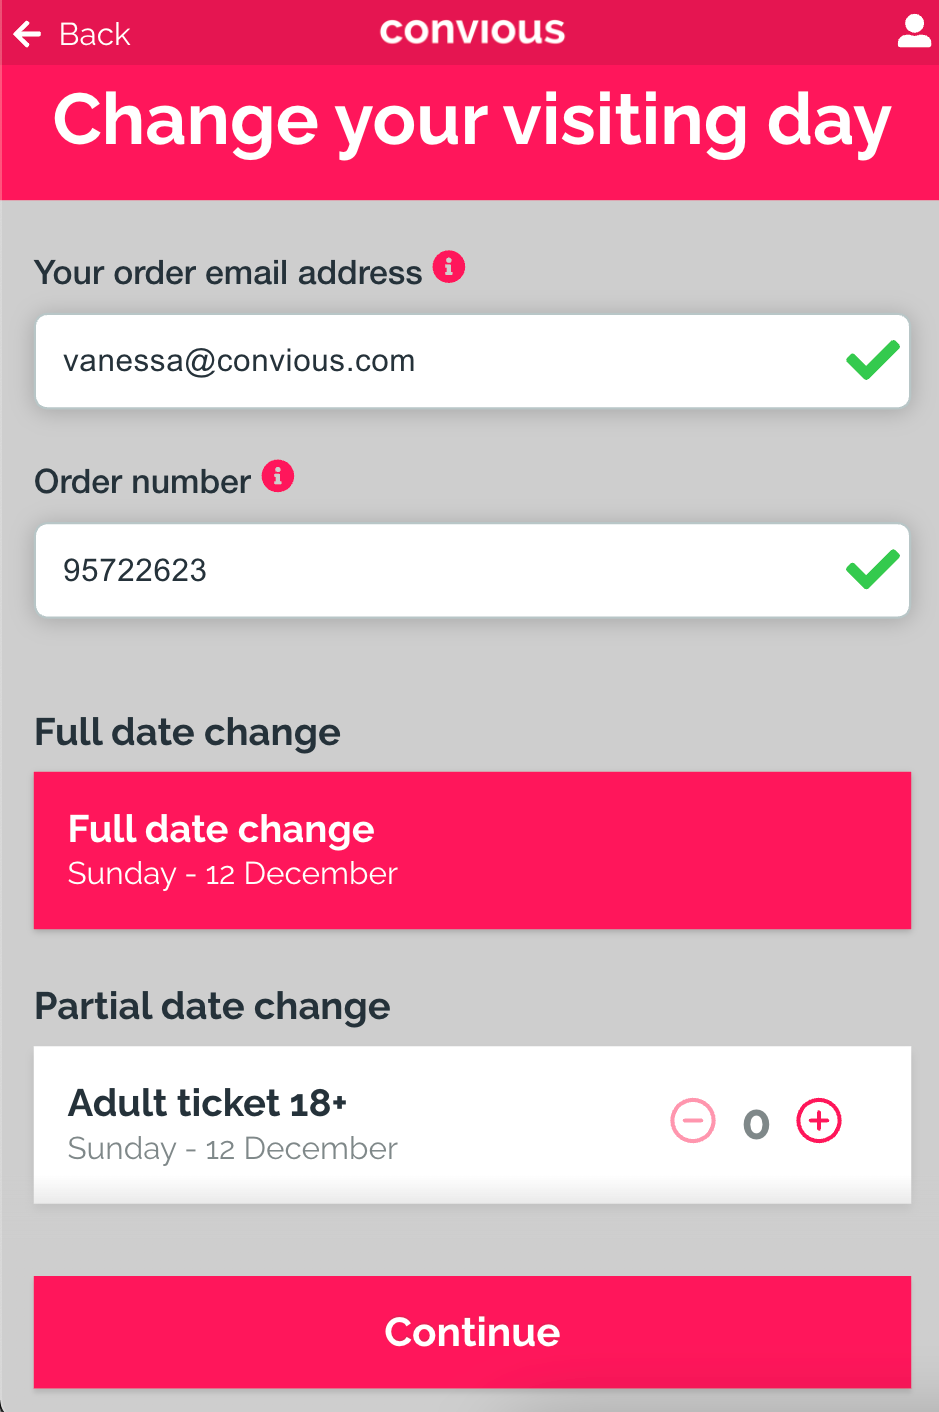
3. They need to enter their order email as well as their order number until the green checkmarks appear.
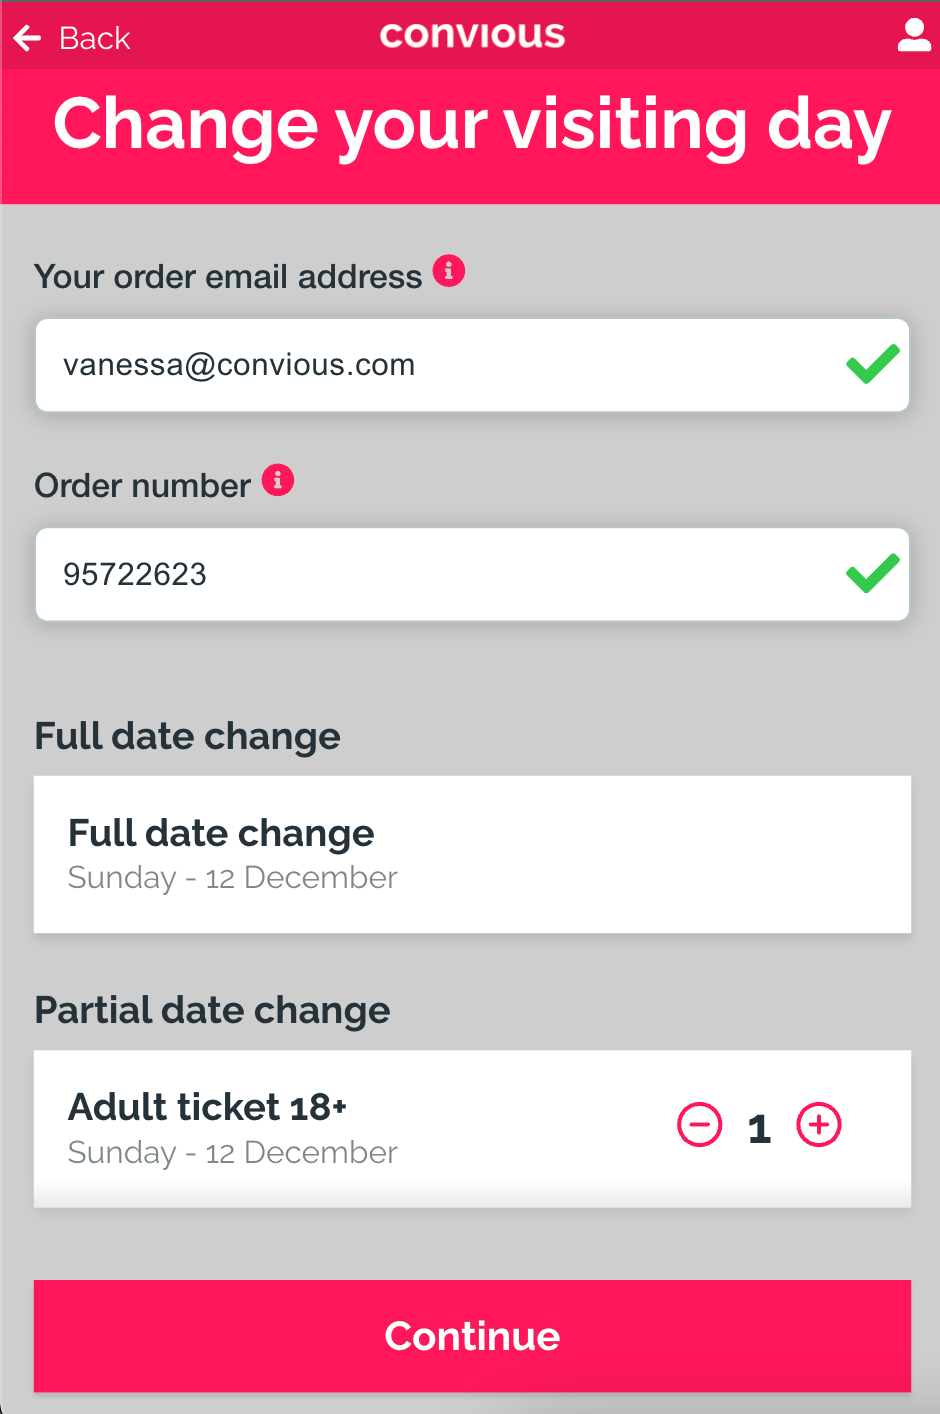
4. Now, your customer will see the option to either select the full order or select partial date change.
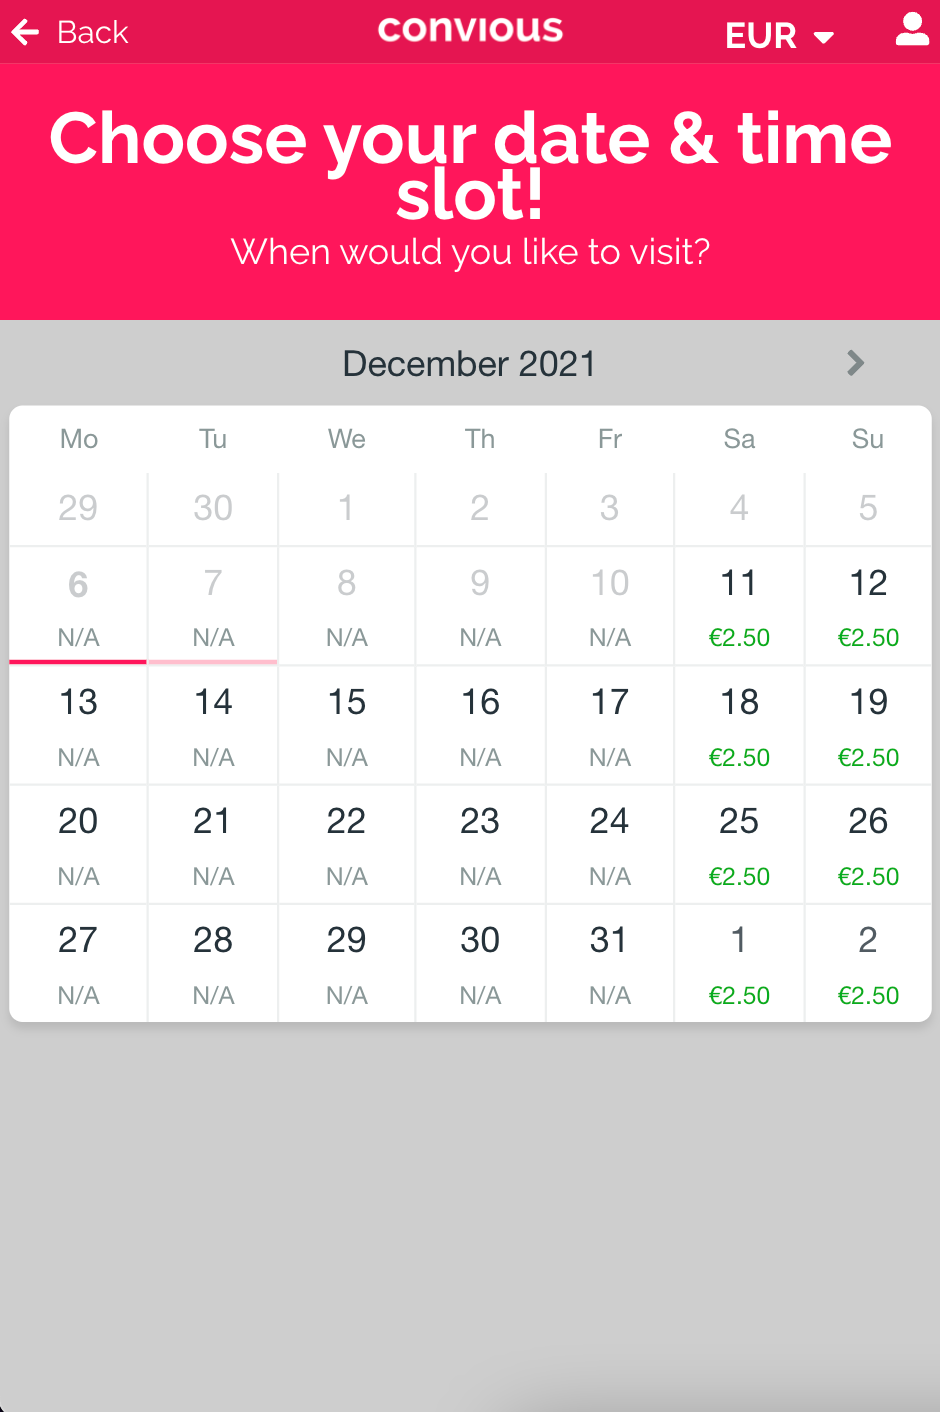
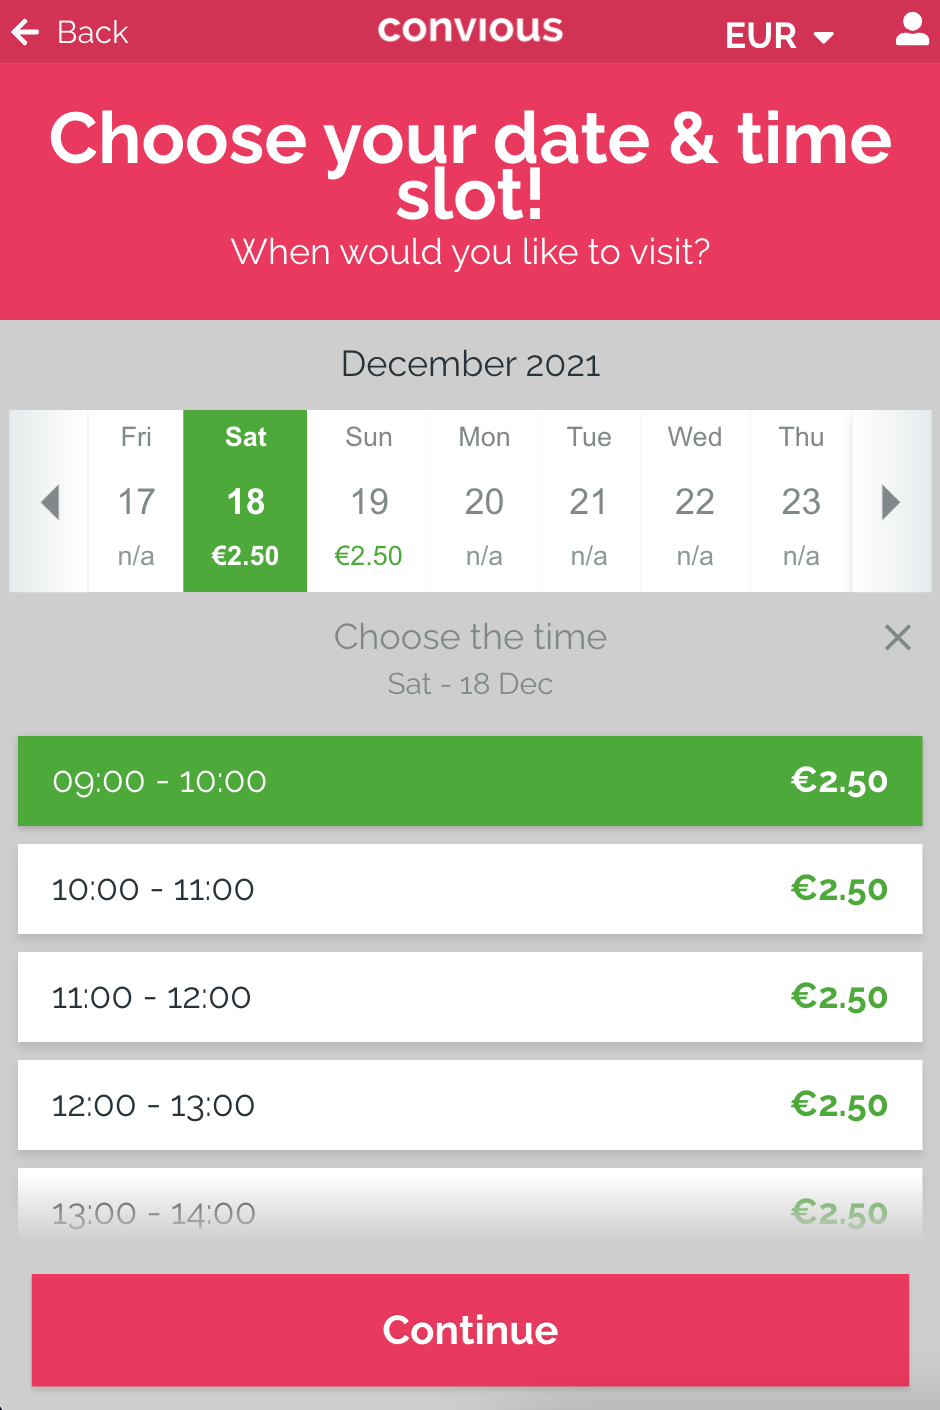
5. Next up, they can choose a new date while seeing the calculated fee for rescheduling their visit. If time slots are set up, they can choose a new time slot as well.
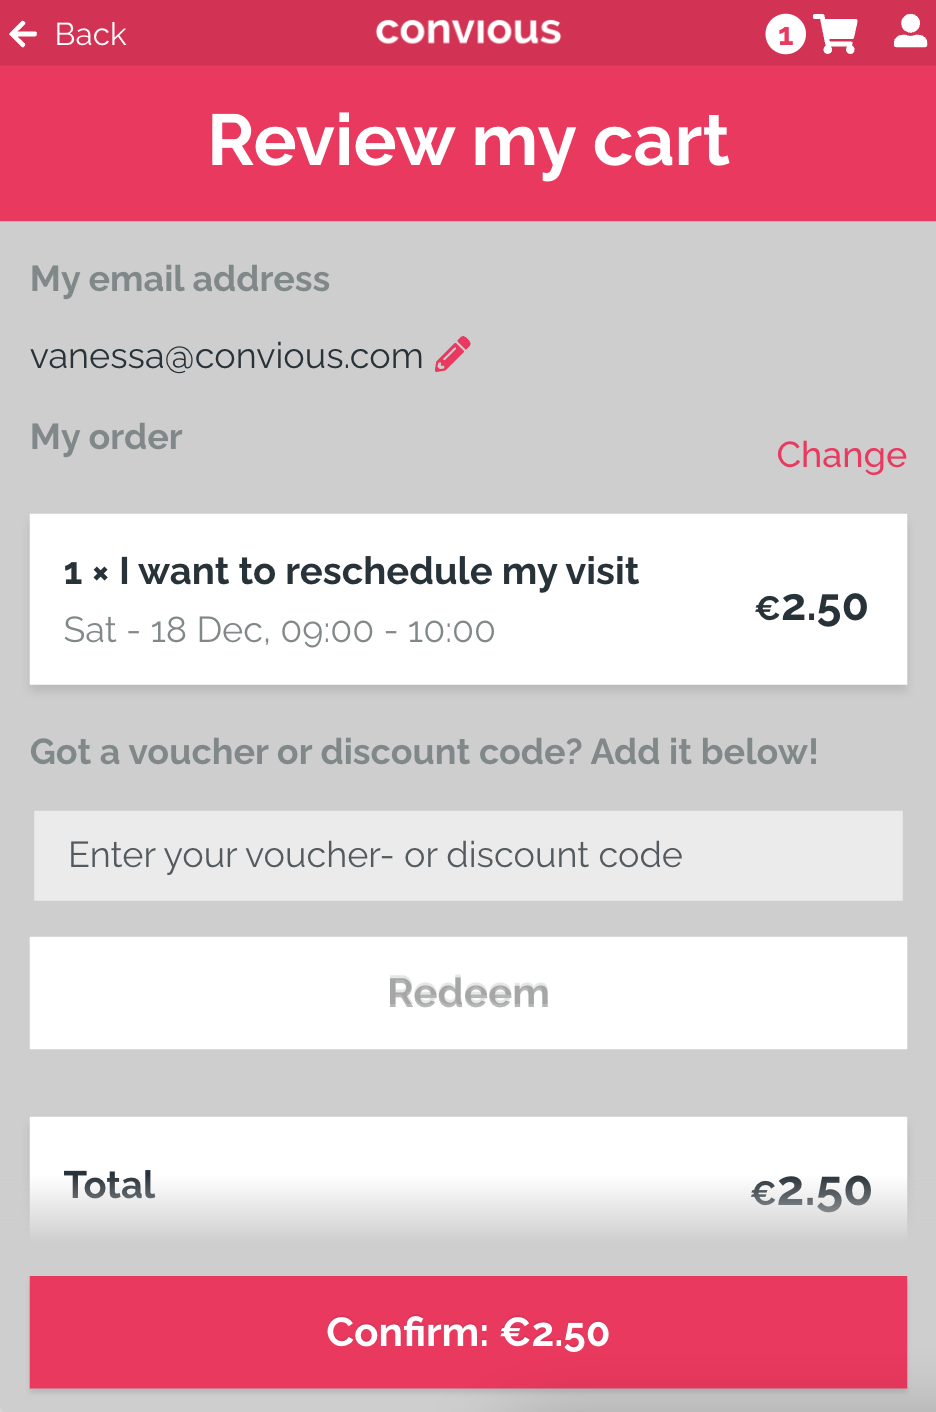
6. Once a date is chosen, they will see an order summary to confirm their choice while, at the same time, giving a health declaration.
7. They confirm their order and receive another confirmation email with a new date of visit but the same order number - done!
This is how easy it is to let your guests reschedule their visit.
It is important for you to know that your date change may be set on unlimited inventory, but it will always take the original order's inventory and apply it to the new date. This means that an order of two Child Tickets and one Adult Ticket rebooked for April 12th will count as 3 Tickets. Thus, the system will reduce the available capacity of April 12th by 3 and book the visit.
And this is not all! We also made it easy for you to see how much extra revenue you generated by offering this feature to your visitors. Just follow the steps below to see your reservation changer revenue:
Track the usage of your date change
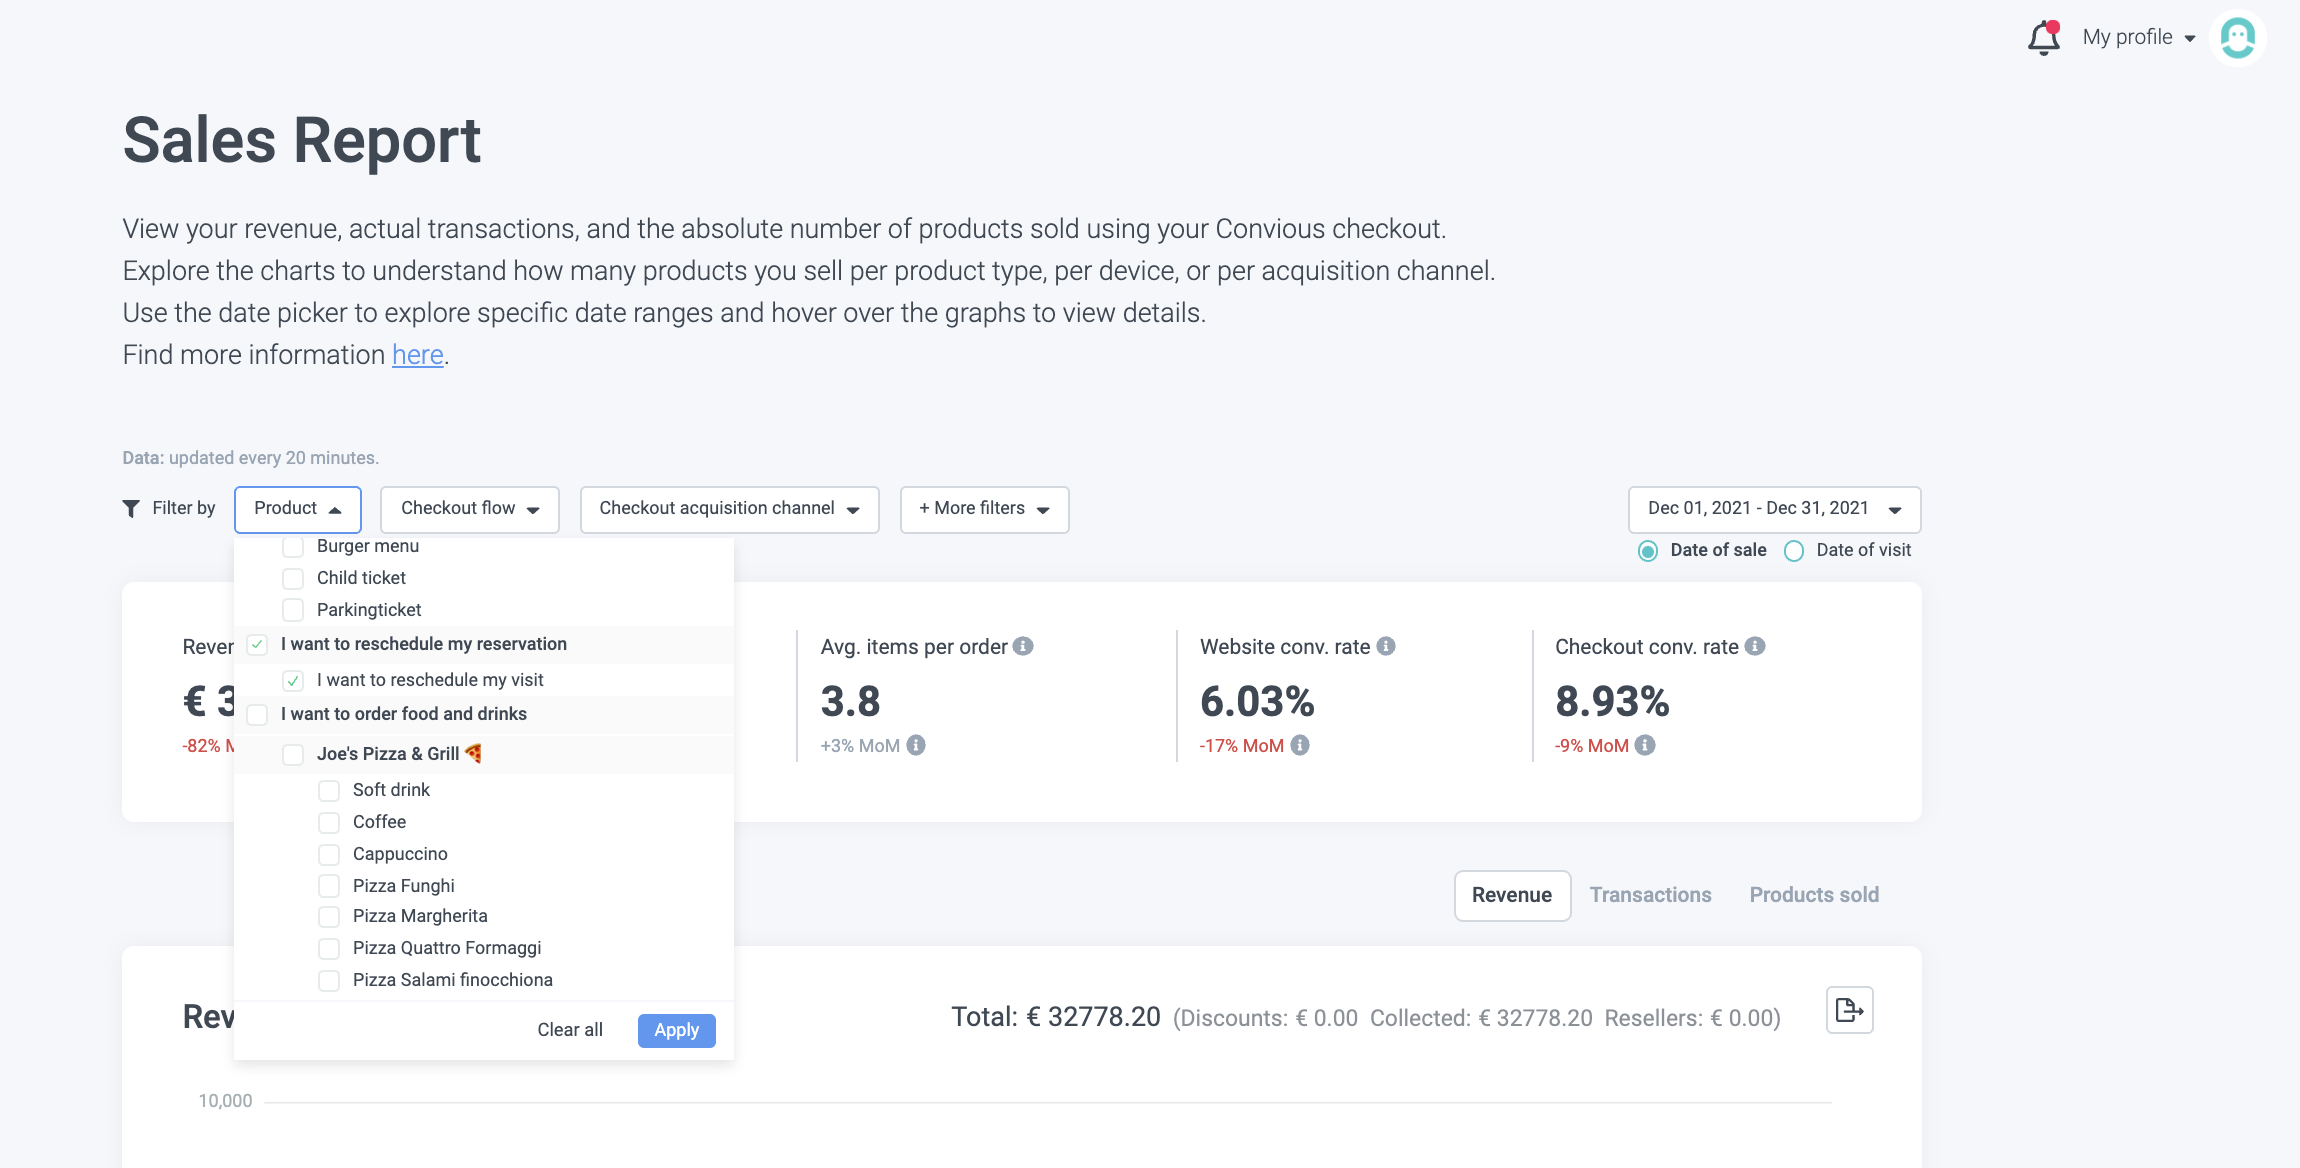
1. Log in to your Convious Control Panel and navigate to ‘Sales’ within the Reports section in the left-hand main menu.
2. Once the section opens, you can add a filter to the product option.
Select your reservation flow.
3. Hit ‘Apply’ and now you can see your stats and total revenue generated only through the self-service reservation changer.
A little heads up: make sure you choose the right time frame at the top-right corner!
Does your date change not look this way? Then we need to enable the partial date change for you. Please contact us via support@convious.com or contact your Customer Success Manager at Convious.
How to set up your date changer per order?
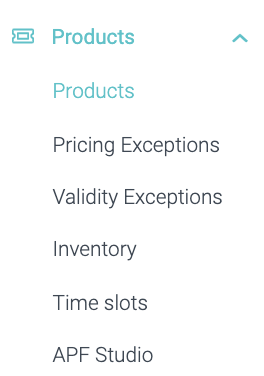
1. Head to your Products Overview.
2. Add a new category.
To get your date changer started, you need to create a new category where your data change product can be hosted.
Click here to recap what the difference between categories and products is.
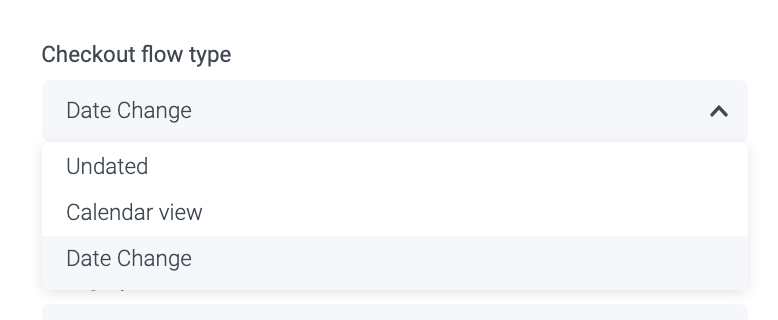
3. When adding a date change category, you need to select Date change as the Checkout flow type.
Do you not see these configuration options? Please contact us via support@convious.com or contact your Customer Success Manager at Convious.
4. Give the flow a name & description that explains what the user can do in this flow.
Make sure to add all translations!
5. Set Parent Category to None because this category is the parent category.
Click here to learn the difference in case you do not know it yet.
6. Set a Category Priority.
We set it to 4 because we want the flow to appear below our regular purchase and reservation flows.
7. We leave Booking horizon and Release time empty because it does not apply here.
If you want to recap what this is all about, click here.
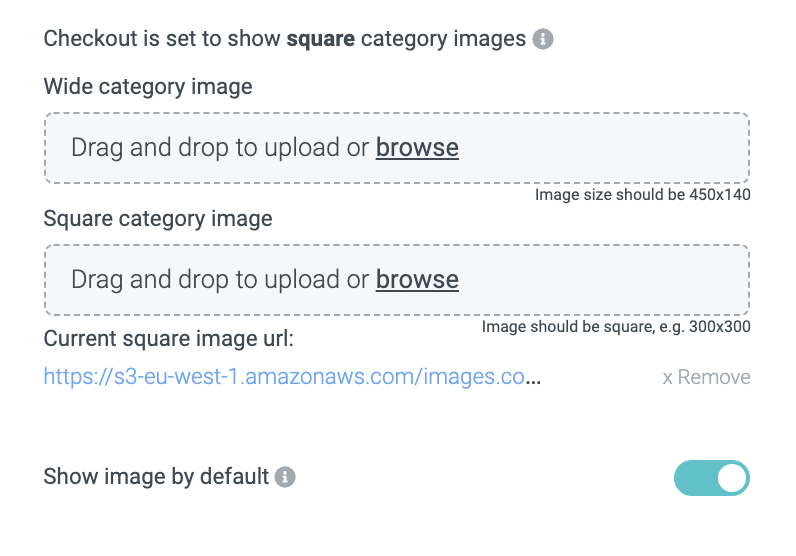
8. Upload an image and enable it to display by default for maximum visibility.
We recommend using square images for one simple but powerful reason: It reduces scroll time. Less scroll time means your potential customers can view all your offers at first sight!
9. Next, if you have time slots enabled for your products that are to be rescheduled, make sure to enable them for the category as well.
10. Activate the category (or do this after you have added the date change product - step: 14 onwards)
11. Is this relevant for resellers? If yes, enable. If not, leave it disabled.
12. Enable it to be shown in your Checkout.
13. Hit save.
The first big step of adding your date changer in place is done!
Now, you need to add the actual data change product.
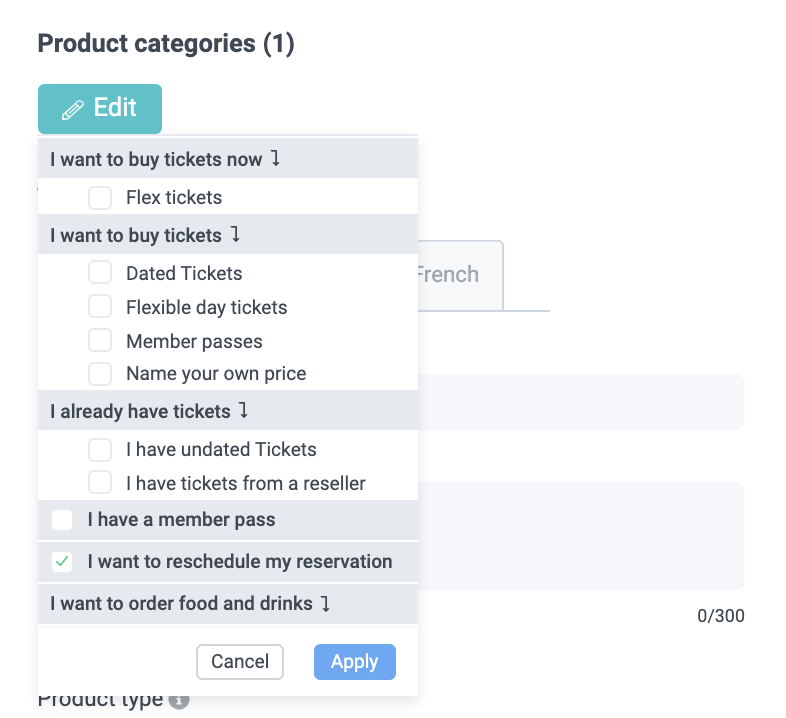
15. Start with assigning the Parent category by selecting your previously created category and hitting Apply.
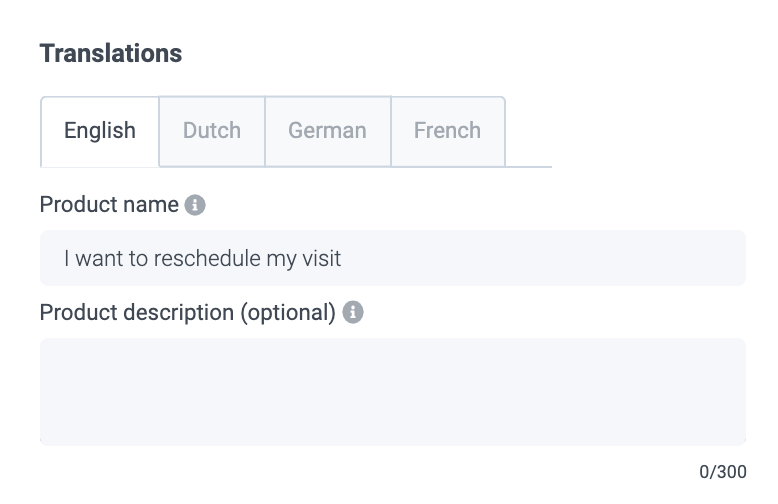
16. Add a Product name & description (& all the translations!).
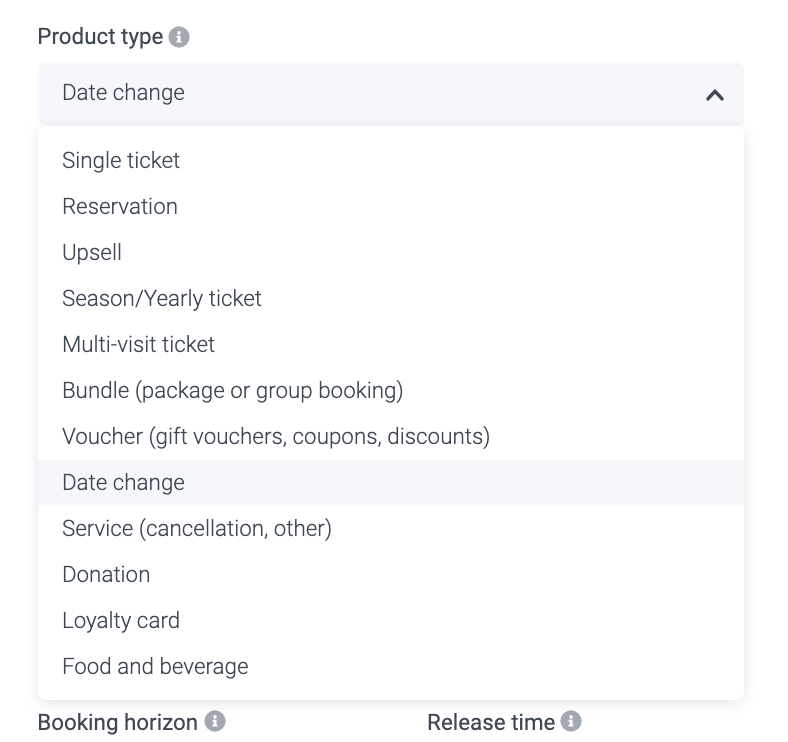
17. Setting the Product type is crucial as here you have to select Date change.
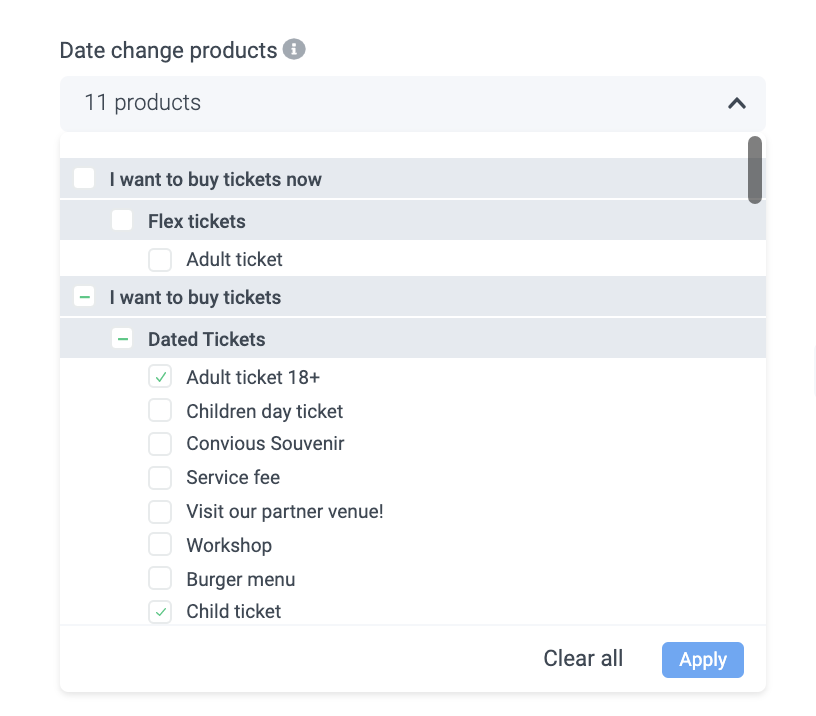
18. Once you have selected this product type you will be able to select products that it applies to. This means you need to select all products that customers should have the ability to change dates for.
After selecting them, make sure to hit Apply.
18. Set Product display for Tap to Single-use ticket.
19. For Pricing, set it to static because if you decide to charge for it, you will probably want to have a fixed price.
20. Next, you can set Priority to 1 as you will only have one product attached.
21. You can set a VAT if you want to overrule your account VAT, but in our case, we leave this field empty.
22. Once again, we leave the Booking horizon and Release time empty because it does not apply here.
23. Next, you can upload images and, again, enable them by default if you'd like.
24. Now, you need to set whether your tickets are redeemable. In our case, the newly issued tickets should indeed be redeemable.
25. Do you need an After Payment Form? Since you have already collected your visitors' information at purchase, in case you do not want to collect any other information, you can leave the APF disabled.
26. Lastly, you can set the minimum and maximum of tickets that can be changed per customer. We advise you to keep this the same number as your other articles to avoid certain orders that can not be changed because they exceed this. We have all products at a maximum of 10 per customer, so we set up the date change the same way
27. Hit Save, and you are another step closer to setting up your date changer.
Now that you have your date change product, you need to set its pricing to take it live.
Be aware: You will also have to set pricing even if the price is 0 Euro!
28. Head over to Configure Pricing.
View our on-demand Convious Academy lesson on how to update prices from your Control Panel to learn it within just 4 minutes
Click here for the whole lesson see updates on Step Size & Charm Pricing and other details.
Some of our partners charge their customers for rescheduling their visit; some do not. It is up to you to enforce your own pricing strategy.
Please be aware: The pricing you set will count per ticket and not per order!
If you have your date change for free, make sure to set a 0 as your price.
Make sure to save your edits!
29. Once you have set up your pricing, go back to the product details and publish your product.
30. Lastly, hit Save once again to save this change.
Now, your date change should be up and running!
We advise conducting a test purchase and changing the date to ensure your configuration is right.
In case you want to learn more about the date changer or want us to set it up for you, please contact your Customer Success Manager.
If you have any questions about setting it up yourself or require assistance, please contact support@convious.com


