Knowing how to close time slots is important as it gives you immediate and full control over your venue. Is an afternoon expected to be quiet, so it makes sense to close early, or do you need to close due to an external influence?
Closing time slots and setting certain rules for them is easy, but we need to keep the different setups in mind. If you want to close a specific time slot, you need to add an exception to your gate capacity.
If you want to shorten your hours or close the entire day, you should use opening hours.
Follow these steps to set up an exception rule:
1. Please navigate to your control panel main menu on the left to Products and then to Inventory.
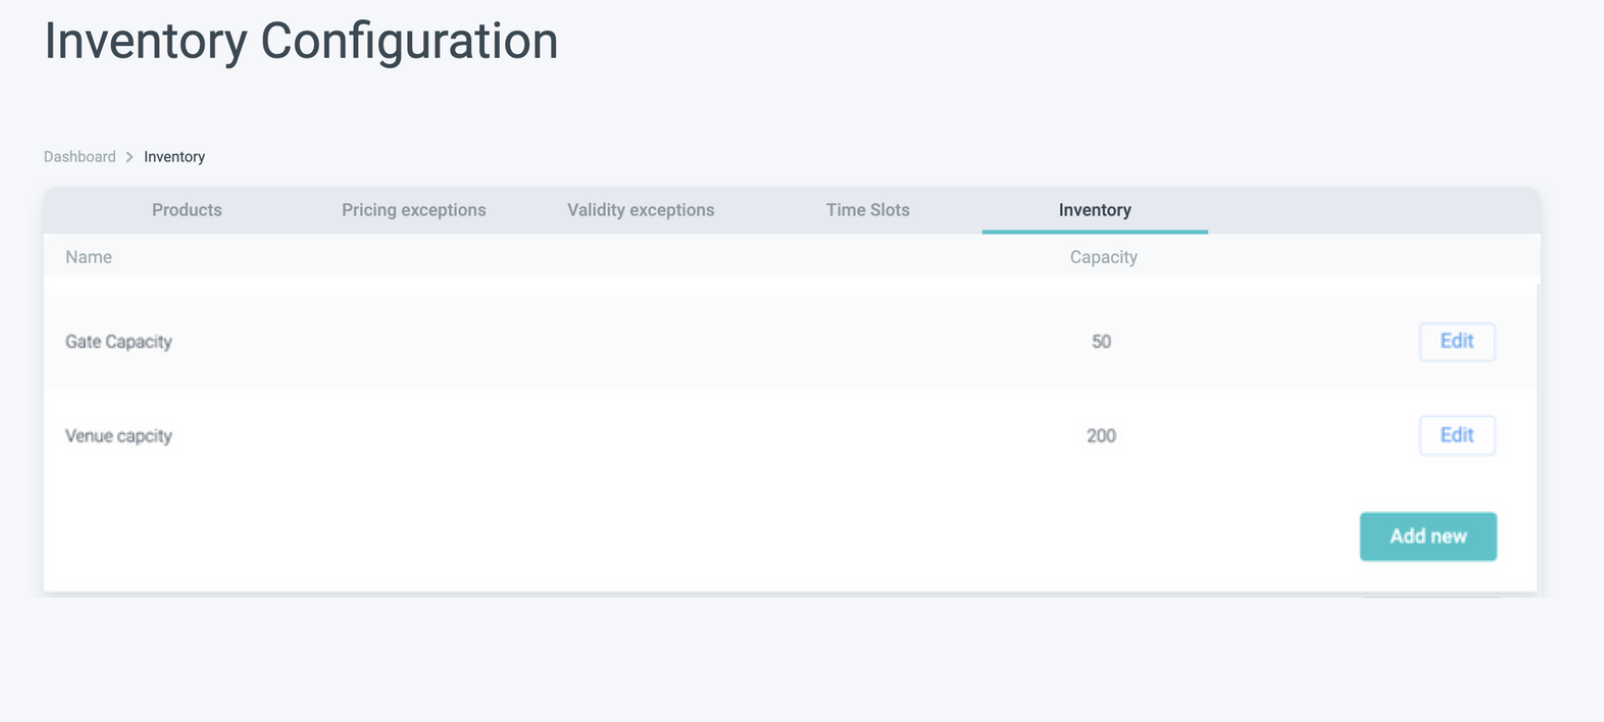
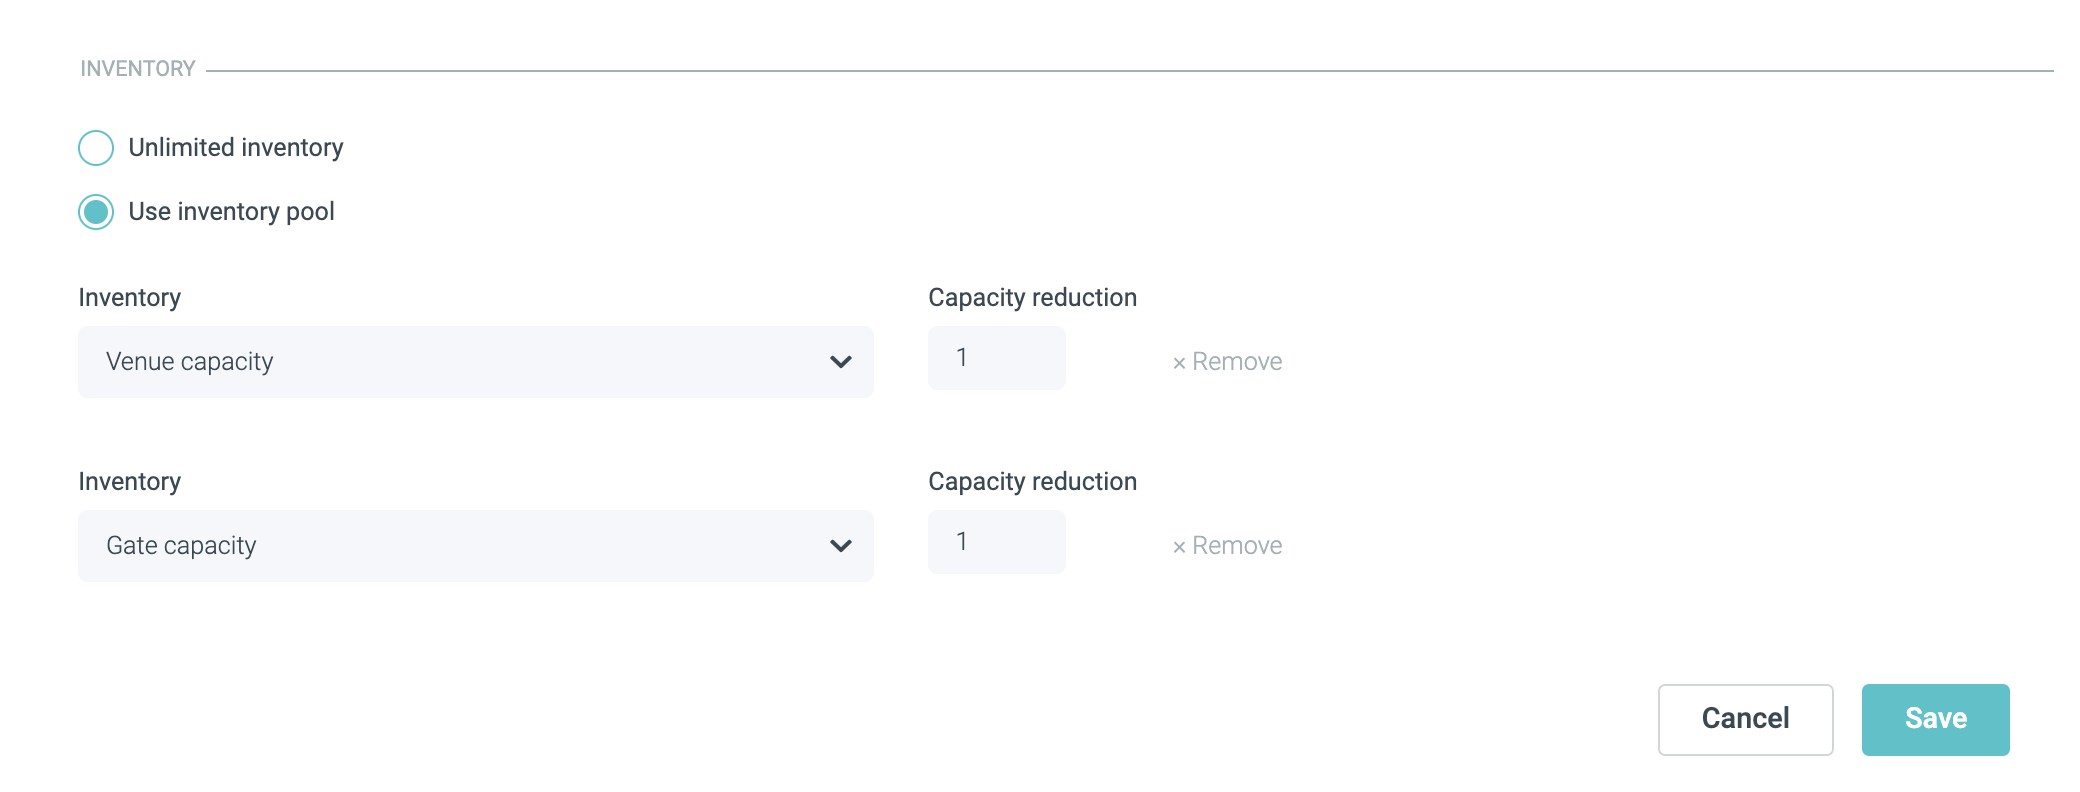
Now you will be at Inventory configuration. Here, you can see your inventory pools.
Depending on your set up, you can have a slightly different structure here. You may have traditional Venue Capacity and Gate capacity, or different capacities for different products.
2. Click on Edit for the relevant inventory pool.
Because you want to close a time slot for a specific article, it is important you go and edit the inventory that is currently connected to the relevant article.
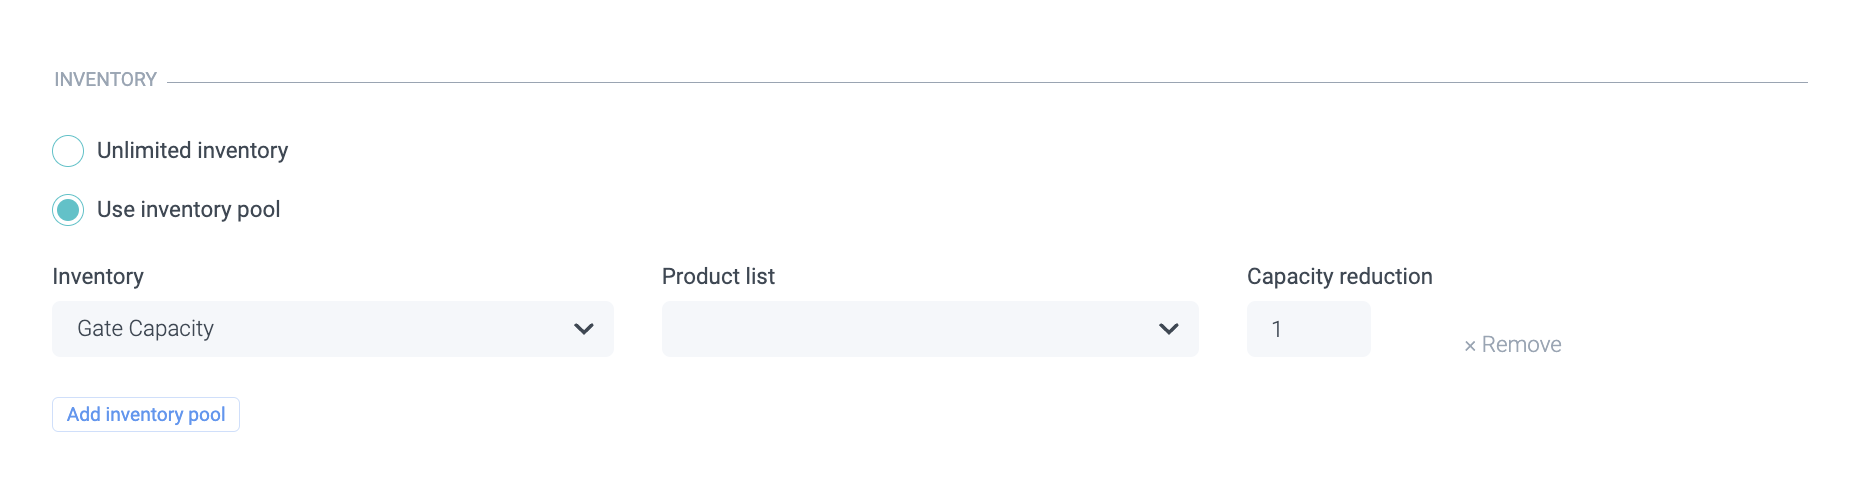
A quick recap: You can find out which inventory pool is connected to your product by checking on the product setup page.
Once you hit edit, you will see all the rules you have previously set up for this inventory pool.
Do you even have different capacity per different time slots? However, no matter how many rules and exceptions you have on the capacity, here you can always view them per time slot along with their weekly pattern, date range and priority.
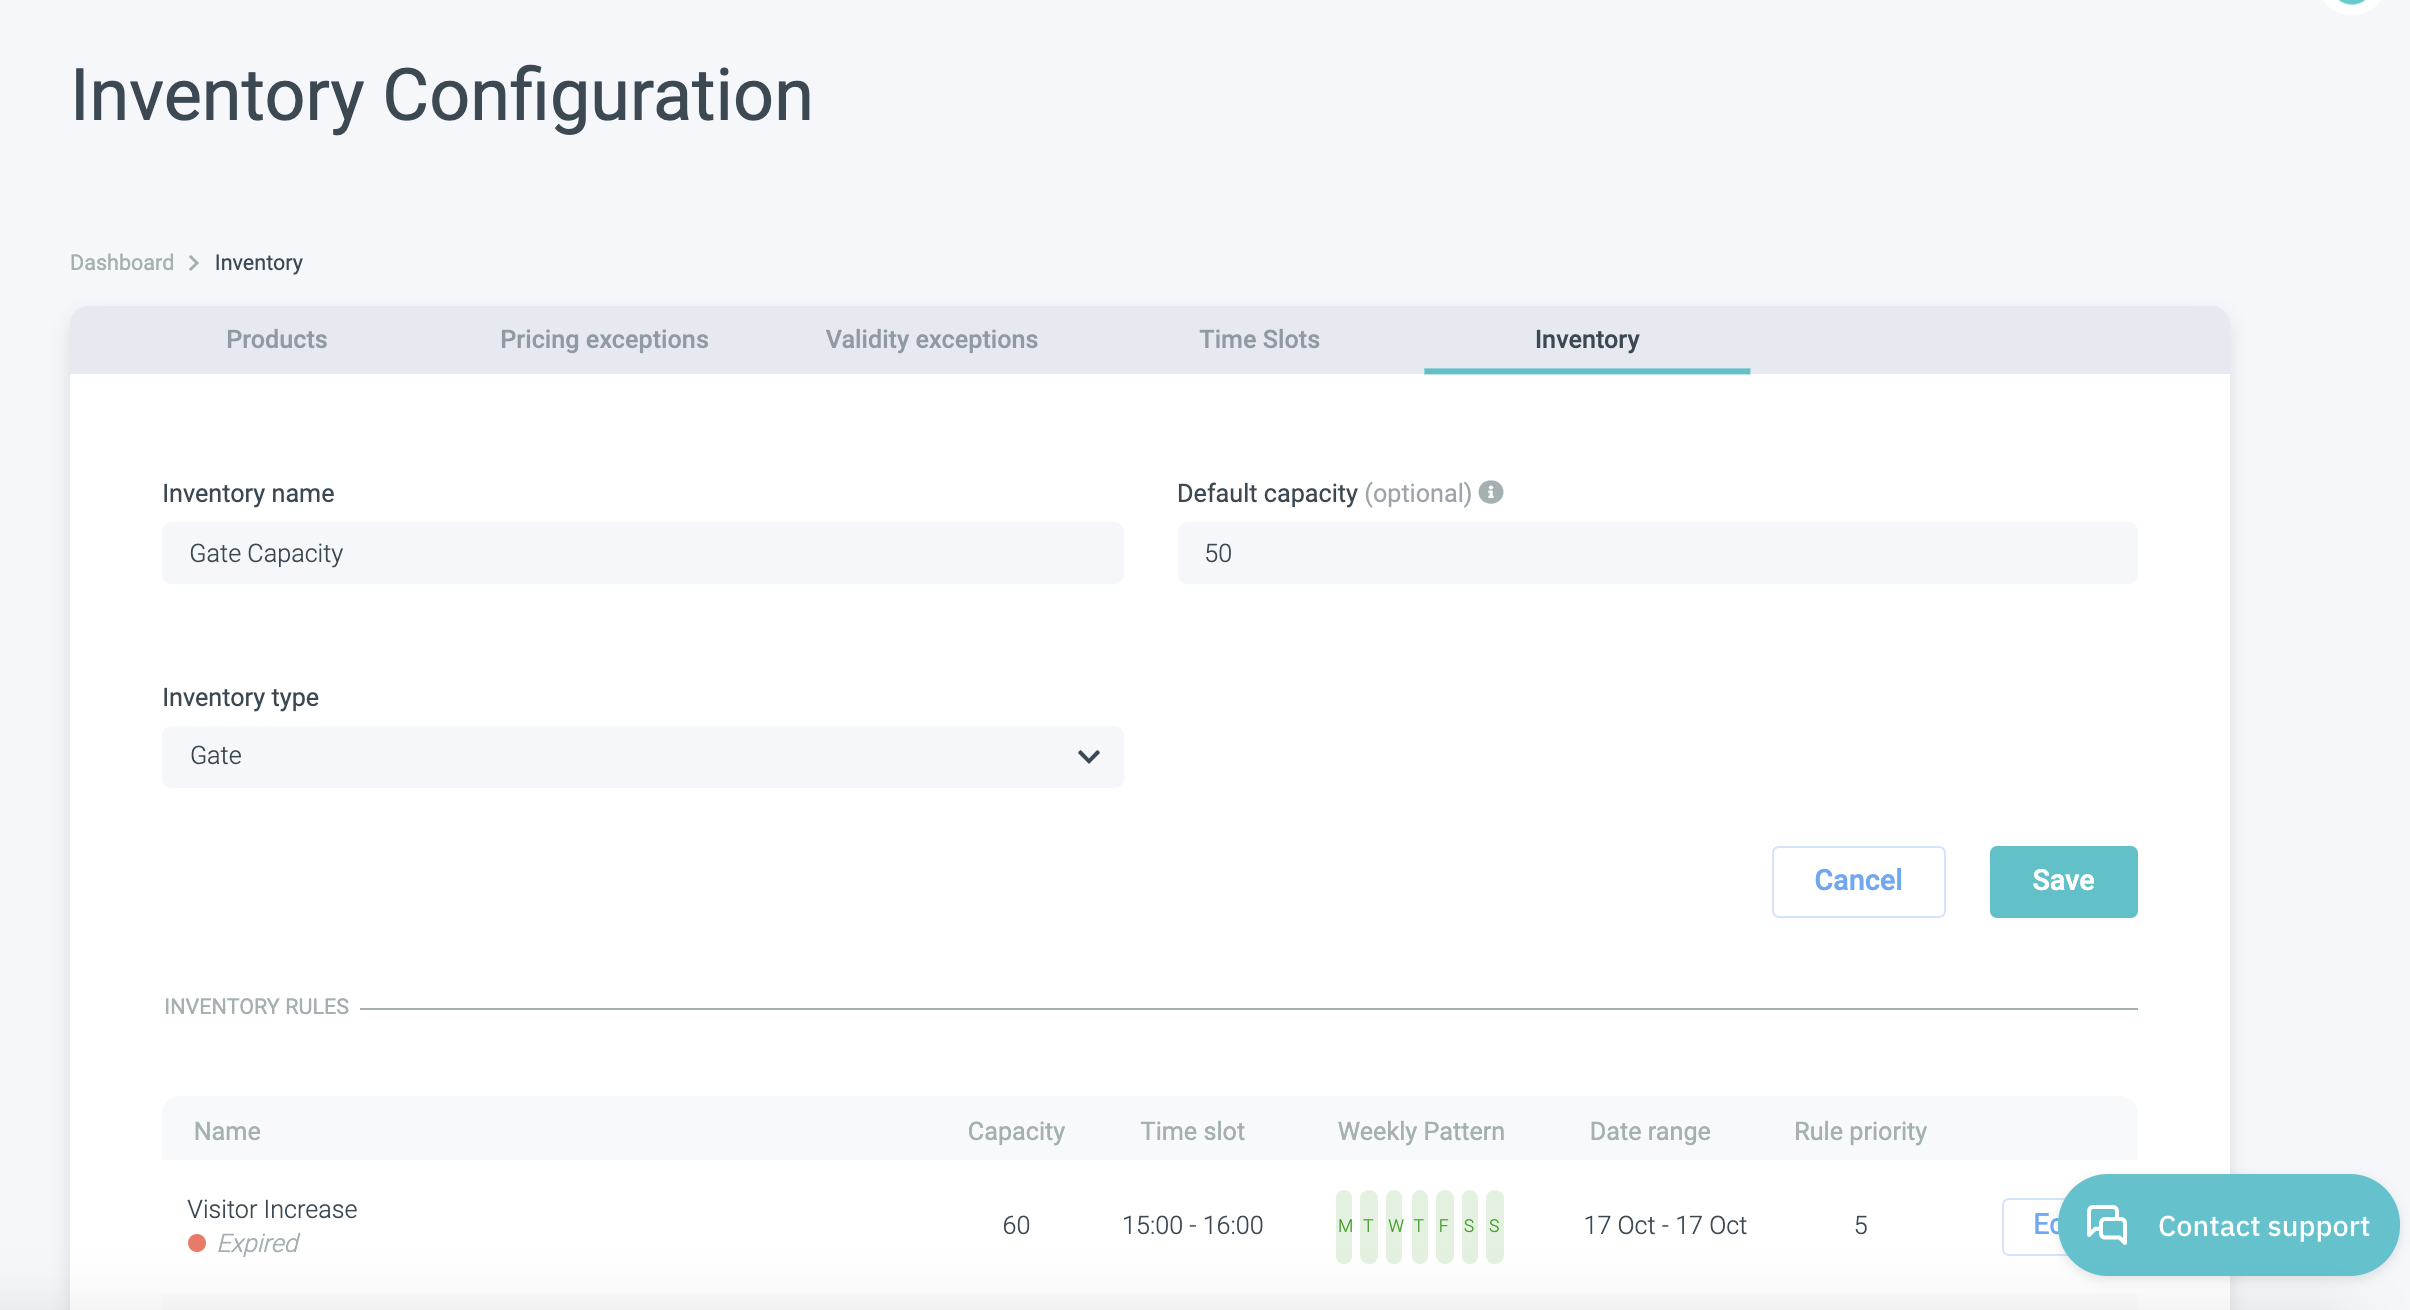
As you can see in the example above, here, the venue has tried a gate capacity visitor increase in the past for a certain time slot on one single day (October 17th).
3. Scroll down and choose Add rule

4. When you add a rule, you need to define:
Rule name - choose something descriptive, so you and your colleagues immediately understand its purpose.
Effective from & effective to - defining the date range of the rule.
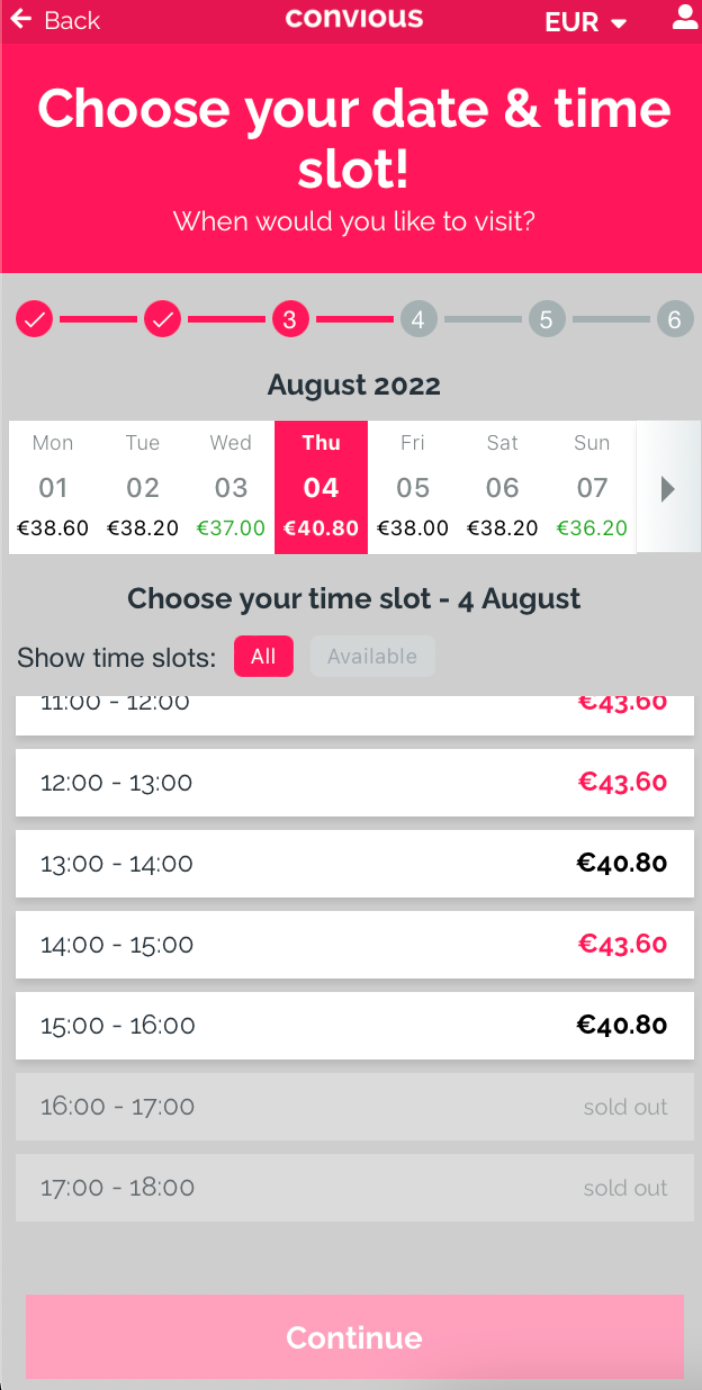
Time from & time to - defining the time slots you are choosing to close or limit. Here it is important that the end time is not inclusive. If a time slot is set to 13:00-15:00, it will apply at 14:30, but not at 15:00.
Weekly pattern - if you have a longer period of time that your rule applies to and it repeats on certain days only (e.g., every Tuesday), this is where you can define that. No need to set it up for every single Tuesday separately.
Capacity - if you want to close a time slot, you are setting it to 0.
Rule priority - as always, you need to tell us how high its priority is; if you are closing a time slot, this should be the highest number out of all your exceptions. Because as you might remember: Higher numbers overrule lower numbers.
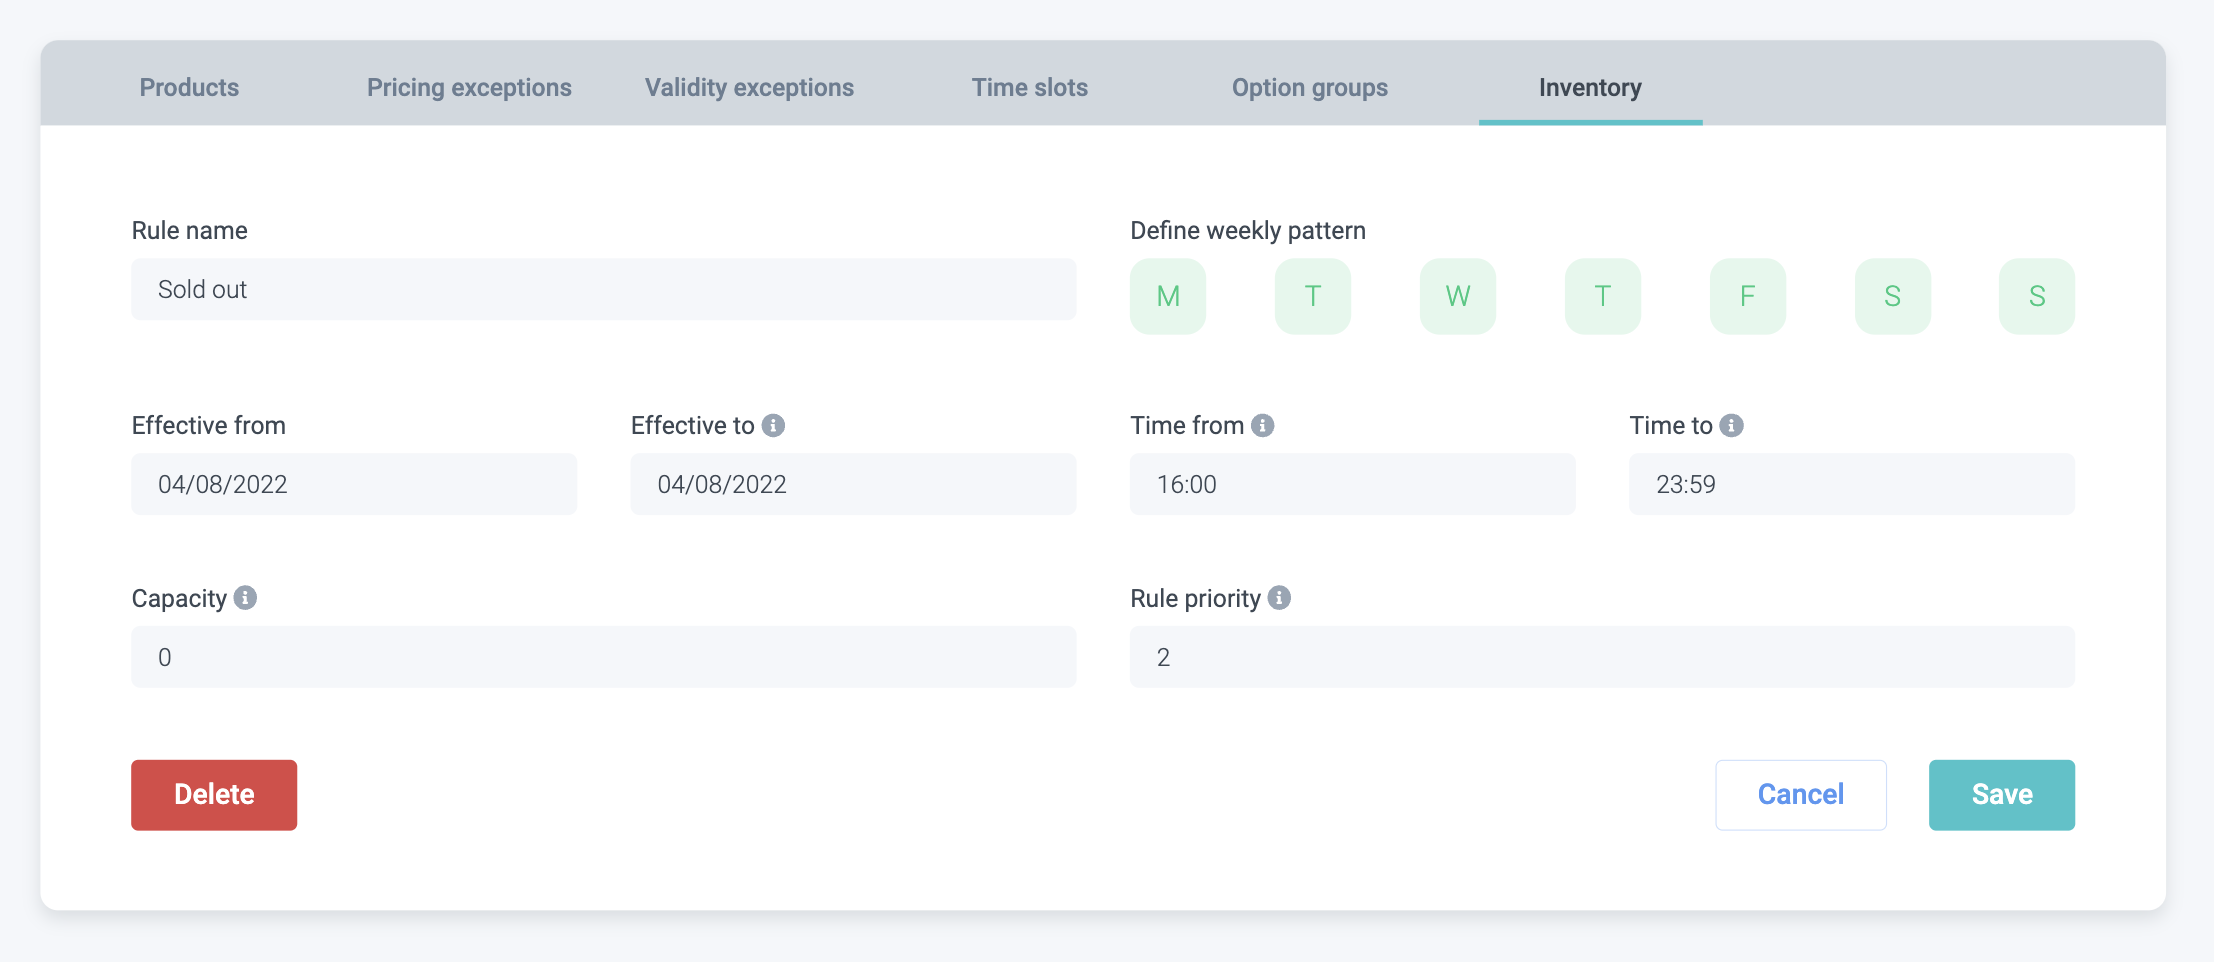
In the example above, we closed the gate (capacity = 0) only on November 3rd from 16:00-18:00 o’clock. We set the priority to 6 to ensure it overrules the rest.
5. Once you have entered your inventory rule, hit save!
6. Now, it is time to check whether your rule is set correctly by checking if it went live.
In the example we showed to above, this is how the check out is showing it:
7. DONE!
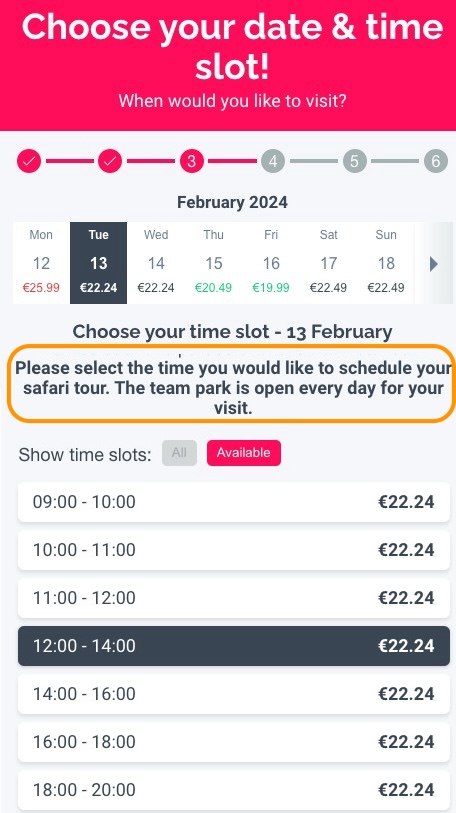
Time slot description
We provide the option to include explanations of what each time slot entails or to offer brief descriptions. For example, consider a partner offering access to both a Team Park and Safari Tour. While your ticket grants admission to both attractions, you'll need to select a specific time slot for your Safari Tour. However, you're free to enjoy the Team Park throughout the day. Please note that this feature is optional.
To set up time slot information, follow these steps:
Navigate to the corresponding category where you'd like to add the information.
Ensure that time slots are enabled for that category.
Once enabled, you'll find an additional input field labeled "Category description (optional)." Here, you can input the information you'd like customers to see. (We provided an example below)
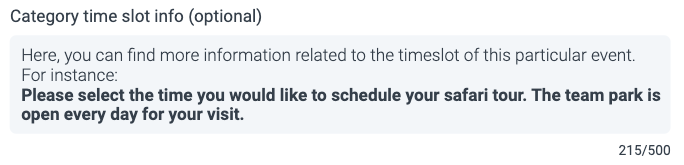
Please keep in mind that you have a limit of 500 characters for the description. Remember, less is more, and more is less. Using fewer characters can lead to higher conversion rates. In fact, in approximately 99% of cases, detailed descriptions aren't necessary and may even reduce conversion rates.
Troubleshooting
Have you set your capacity to 0 in the exception rule and double-checked priority, but it still won’t show for the products you want to close it for? Make sure to check if your products are connected to the right inventory pool! As an inventory pool will only work if connected to the articles.
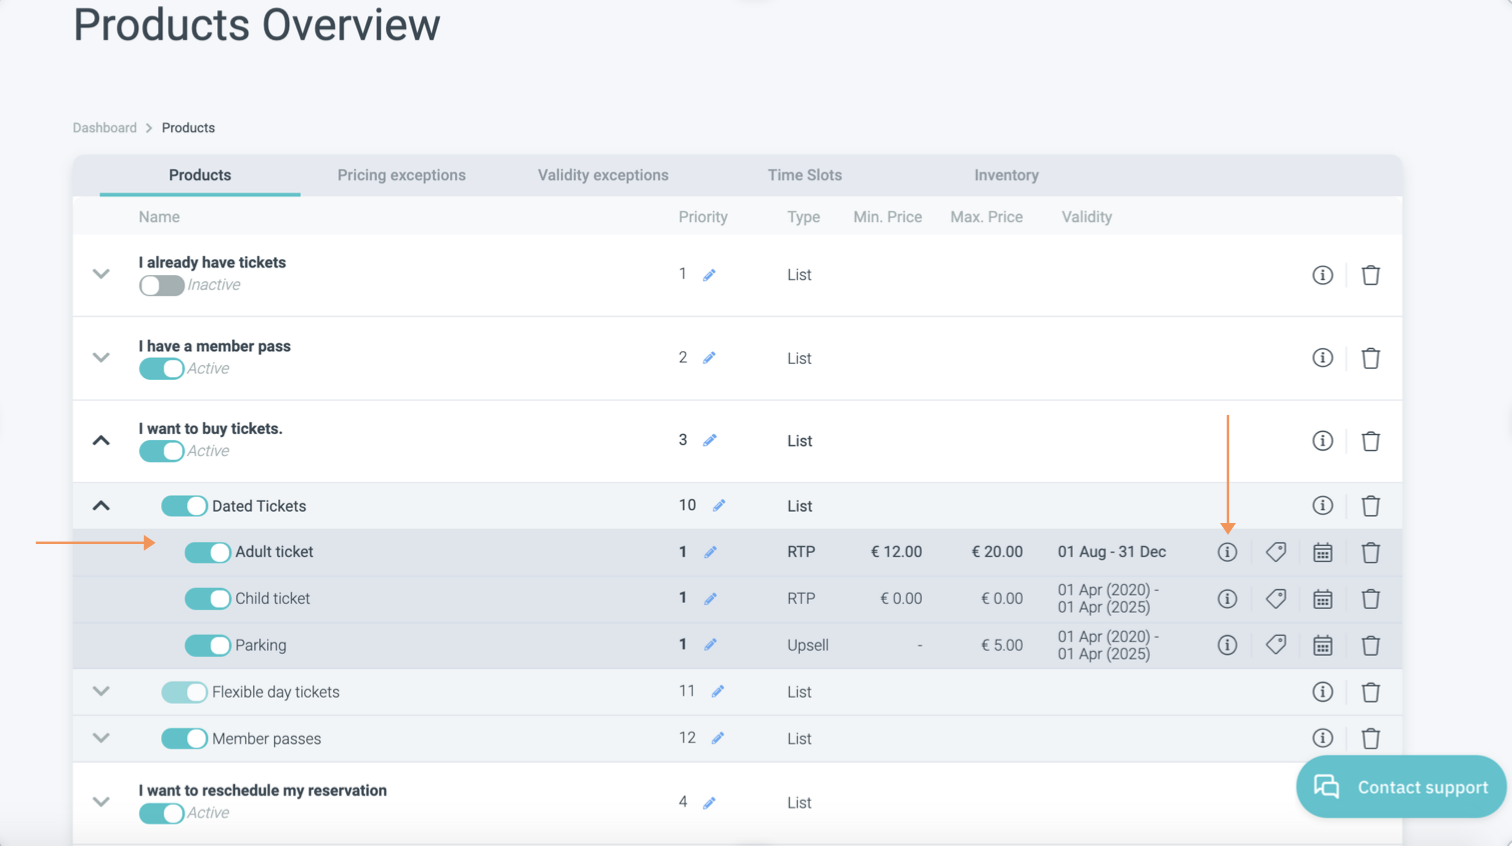
You can do that by going to your product overview, choosing the product you seem to be unable to close the time slot for - in the example, we used the Adult ticket article.
Click on the i icon to view its settings. Scroll down to the inventory pool to view what inventory pool the product is connected to. According to your set-up, your inventory needs to be connected differently.
Set-up 1, a full day venue using time slots with different starting times but the same end time, and set-up 2: X-hour visit venue where time slots have a different starting time and different end times, the inventory should be connected to both: gate & venue capacity. Whereas set-up 3, which consists of only gate capacity, also, subsequently, only needs to be connected to only gate capacity.
In a nutshell: If you are using both gate and venue capacity, connect both. If not, then do not.
Make sure to save any changes you make.