1. Crowd Control Overview
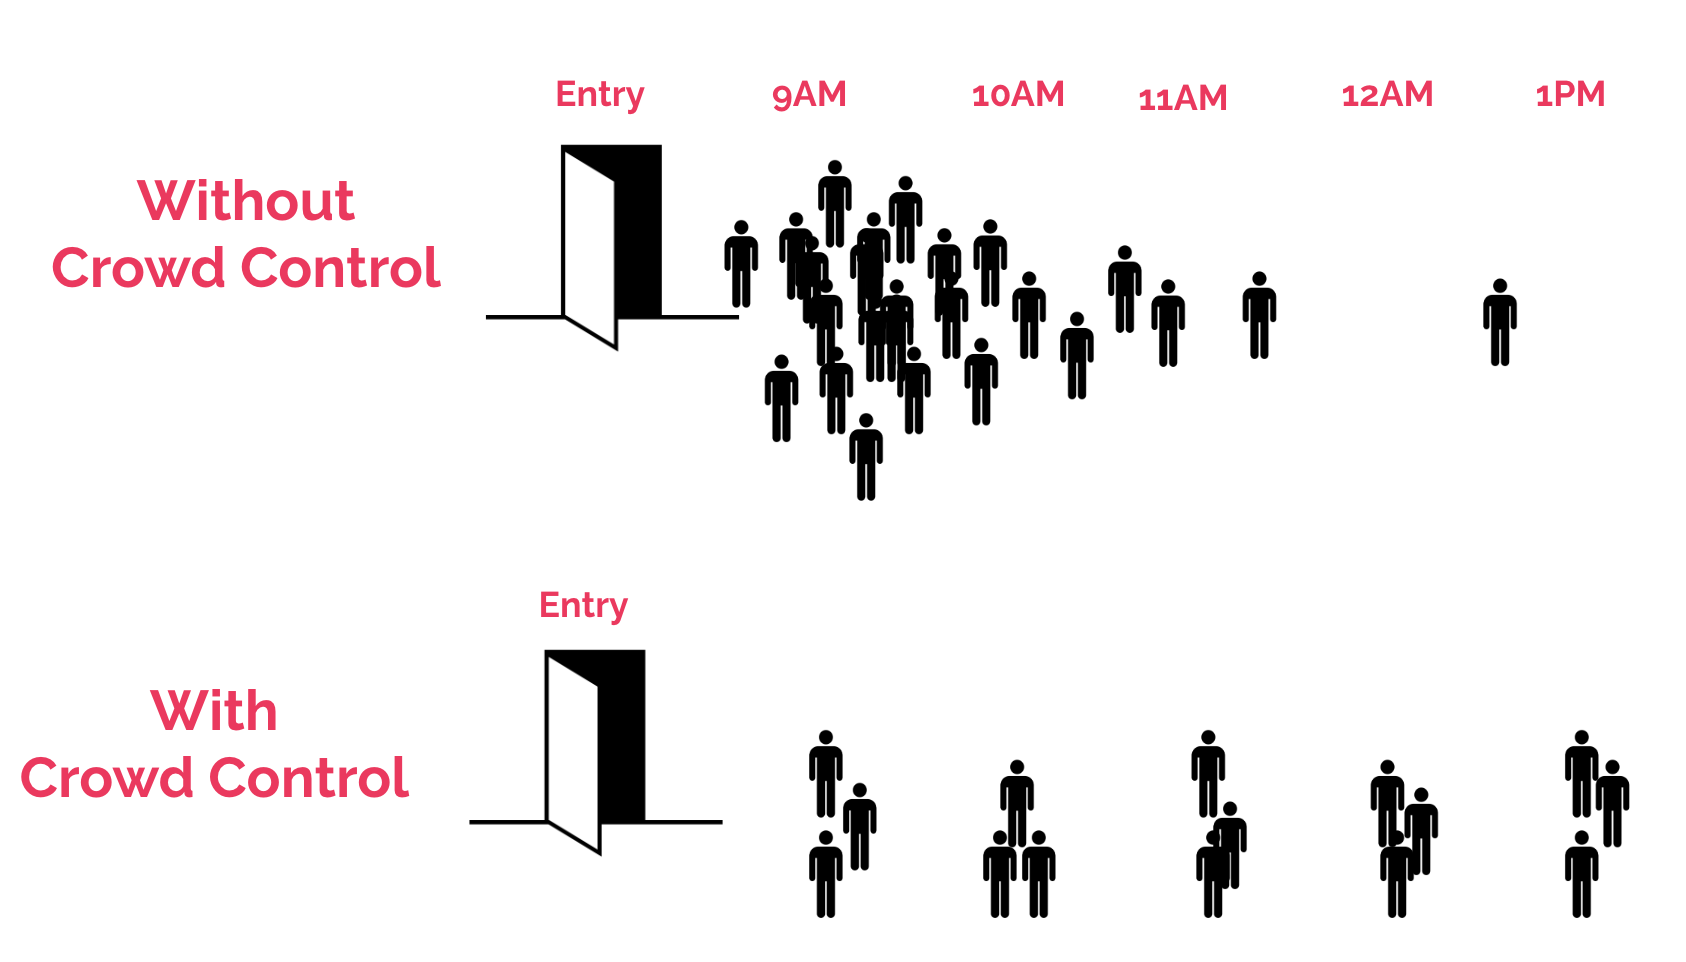
Crowd Control is a service that helps manage how many people come to your venue and when. The purpose of Crowd Control is to make sure visitors arrive at different times and not all together. This improves the visitor experience and ensures there are always enough staff available to help if anyone needs it.
To manage how many guests come in, you can set up the following:
Admission Limit: Admission Limit helps control the number of people entering at once. You decide how many people you can handle for each activity or overall. This ensures a smoother experience and avoids overcrowding.
Capacity Limit: Capacity Limit is useful when you have limited space or shared resources, and you want to avoid overcrowding. You can set a limit on how many people can be in each activity or overall at once, without worrying about conflicts between time slots or different visitors arriving.
Timeslots: You can set up when activities start and how long they last. This is closely connected to both Admission Limit and Capacity Limit, as it tells us when activities begin and end.
Important note on capacity with time slots:
When time slots are configured, the capacity limit you set applies per time slot, not as a total daily capacity. This means each individual time slot has its own capacity counter. For example, if you set a capacity of 200 and have 5 non-overlapping time slots, up to 1,000 visitors can be accommodated across the day (5 × 200). If your time slots overlap (e.g. each slot has a start and end time that runs into the next), the capacity represents the maximum number of simultaneous visitors allowed at any point.
2. Admission Limit use cases
Admission Limit is important in many parts of the venue. Here are some examples:
Ride Entrances: At popular rides where there are long lines, the Admission Limit helps organize the flow of visitors waiting to get on the ride. Each visitor gets a specific time to go on the ride.
Character Meet-and-Greets: When visitors want to meet theme characters, Admission Limit keeps the line orderly. This ensures everyone gets a chance to meet the characters without too many people crowding around.
Ticketing Booths: At the venue entrance or ticket booths, especially when it's busy, Admission Limit makes sure visitors can check in quickly and without problems.
Shows and Performances: Before shows or performances start, there might be lines to get in. Admission Limit helps control the line, making sure visitors enter in an organized way and reducing delays.
In all of these situations, the Admission Limit helps make the visitor experience better by cutting down on wait times, avoiding overcrowding, and keeping things orderly in the venue.
3. Capacity Limit use cases
Capacity Limit is important in many parts of the park to make sure visitors have a safe and fun time. Here are some examples:
Overall Venue Capacity: Set the maximum number of visitors allowed in the venue, especially during busy seasons or special events. This prevents the venue from getting too crowded, keeps it comfortable, and makes sure facilities aren't overwhelmed.
Individual Attractions: Set limits on how many people can go on specific rides or watch shows. This prevents long waits, makes things safer, and makes the visitor experience better overall.
Indoor Facilities: Control how many people can be inside indoor attractions to follow fire safety rules and social distancing guidelines. This keeps indoor areas comfortable, accessible, and safe for visitors.
Special Events: During concerts, parades, or fireworks, make sure there aren't too many people in one area. This keeps things safe, makes sure everyone can see and makes the event more enjoyable.
Seasonal Exhibits or Installations: For temporary exhibits or installations, set limits on how many people can be there at once. This makes sure guests have enough space to explore without feeling crowded, making the experience better.
By using Capacity Control in these ways, venues can manage crowds, keep everyone safe, and make sure visitors have a great time.
4. Setup Instructions
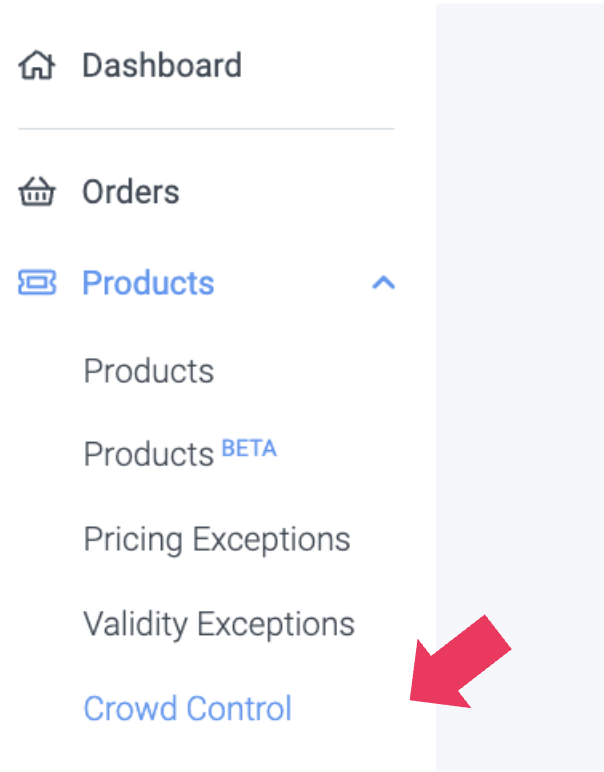
4.1. Find the Crowd Control under the Product section in your left menu
4.2. Start by adding new activities by pressing 'Add New'

4.3. Setup Activity name, Limit type and Limit
Activity name: name your activity/experience or even resource, where you want to set a limit.
Limit type*: choose limit type by pressing on the icons. Consult the type use cases above.
Default limit: you can either enter your desired limit, or choose unlimited option. Note, that you can set different limits for different time periods by adding limit exceptions.
* Please note that the Limit type cannot be easily changed once created. Changing it may result in inaccurate remaining spots calculation and potential overbooking. If you still need to update the pool type, please contact our Support Team for assistance.
4.4. (Optional) Add limit exceptions for different time periods
Limit exceptions allow you to override the default capacity for specific days or time periods. There are two ways to use them:
Changing capacity on specific days: You can increase or decrease the capacity on a particular date. Setting the exception to 0 will effectively close that day, preventing any new bookings.
Adjusting or blocking specific time slots (when time slots are set up): You can reduce the capacity for a particular time slot, or block it entirely by setting it to 0. When defining the exception period for a time slot, it is critical that the end time of your exception stops just before the next time slot begins.
For example: if you have time slots running 13:00–14:00 and 14:00–15:00, and you want to reduce capacity only for the first slot, your exception should be set from 13:00 to 13:59 — not 14:00. If the exception end time reaches 14:00, it will also affect the 14:00–15:00 slot, since 14:00 falls within that exception's range. The same logic applies to day-level exceptions: when closing a full day, the exception period should end at 23:59, not midnight (00:00 of the next day), to avoid accidentally affecting the following day.
In short: always end your exception 1 minute before the next time slot or the next day starts.
4.5. You are Done 🎉
Congratulations! You had set up how many people come to your venue and when.
Now you should set up the timing of your activities session, or Timeslots.