Article Navigation
1. Why is Validity Management important?
Having the flexibility to manage your venue's calendar for every one of your products is not only crucial for obvious operational matters but also because without validity and pricing settings, the products you generate on the Control Panel won't show up on your Convious check-out.
Validity settings come in handy especially when there's a wide variety of product types within your offering, since it's highly unlikely that these will all be valid for the same exact dates or time frames.
For example, if you are selling Season Cards, single event tickets, in your Convious ticket shop some of these tickets will be valid for only one specific date (e.g: a firework show event on the 3rd of August), while others will be valid for multiple dates within a longer period of time (e.g: Season Cards only valid from the 1st of February until the 30th of June, or school visits only valid from Mondays to Fridays). The time-frame combinations can be very diverse.
Therefore, you need to be able to set up the dates for which each of your products are valid, and contrarily, exclude them for those days for which they are not.
Luckily, you have the power to do this yourself directly from your Convious Control Panel. If you want to learn how just keep reading. We're here to guide you step by step.
2. Setting up and managing validity dates
1. Log in and go to Products
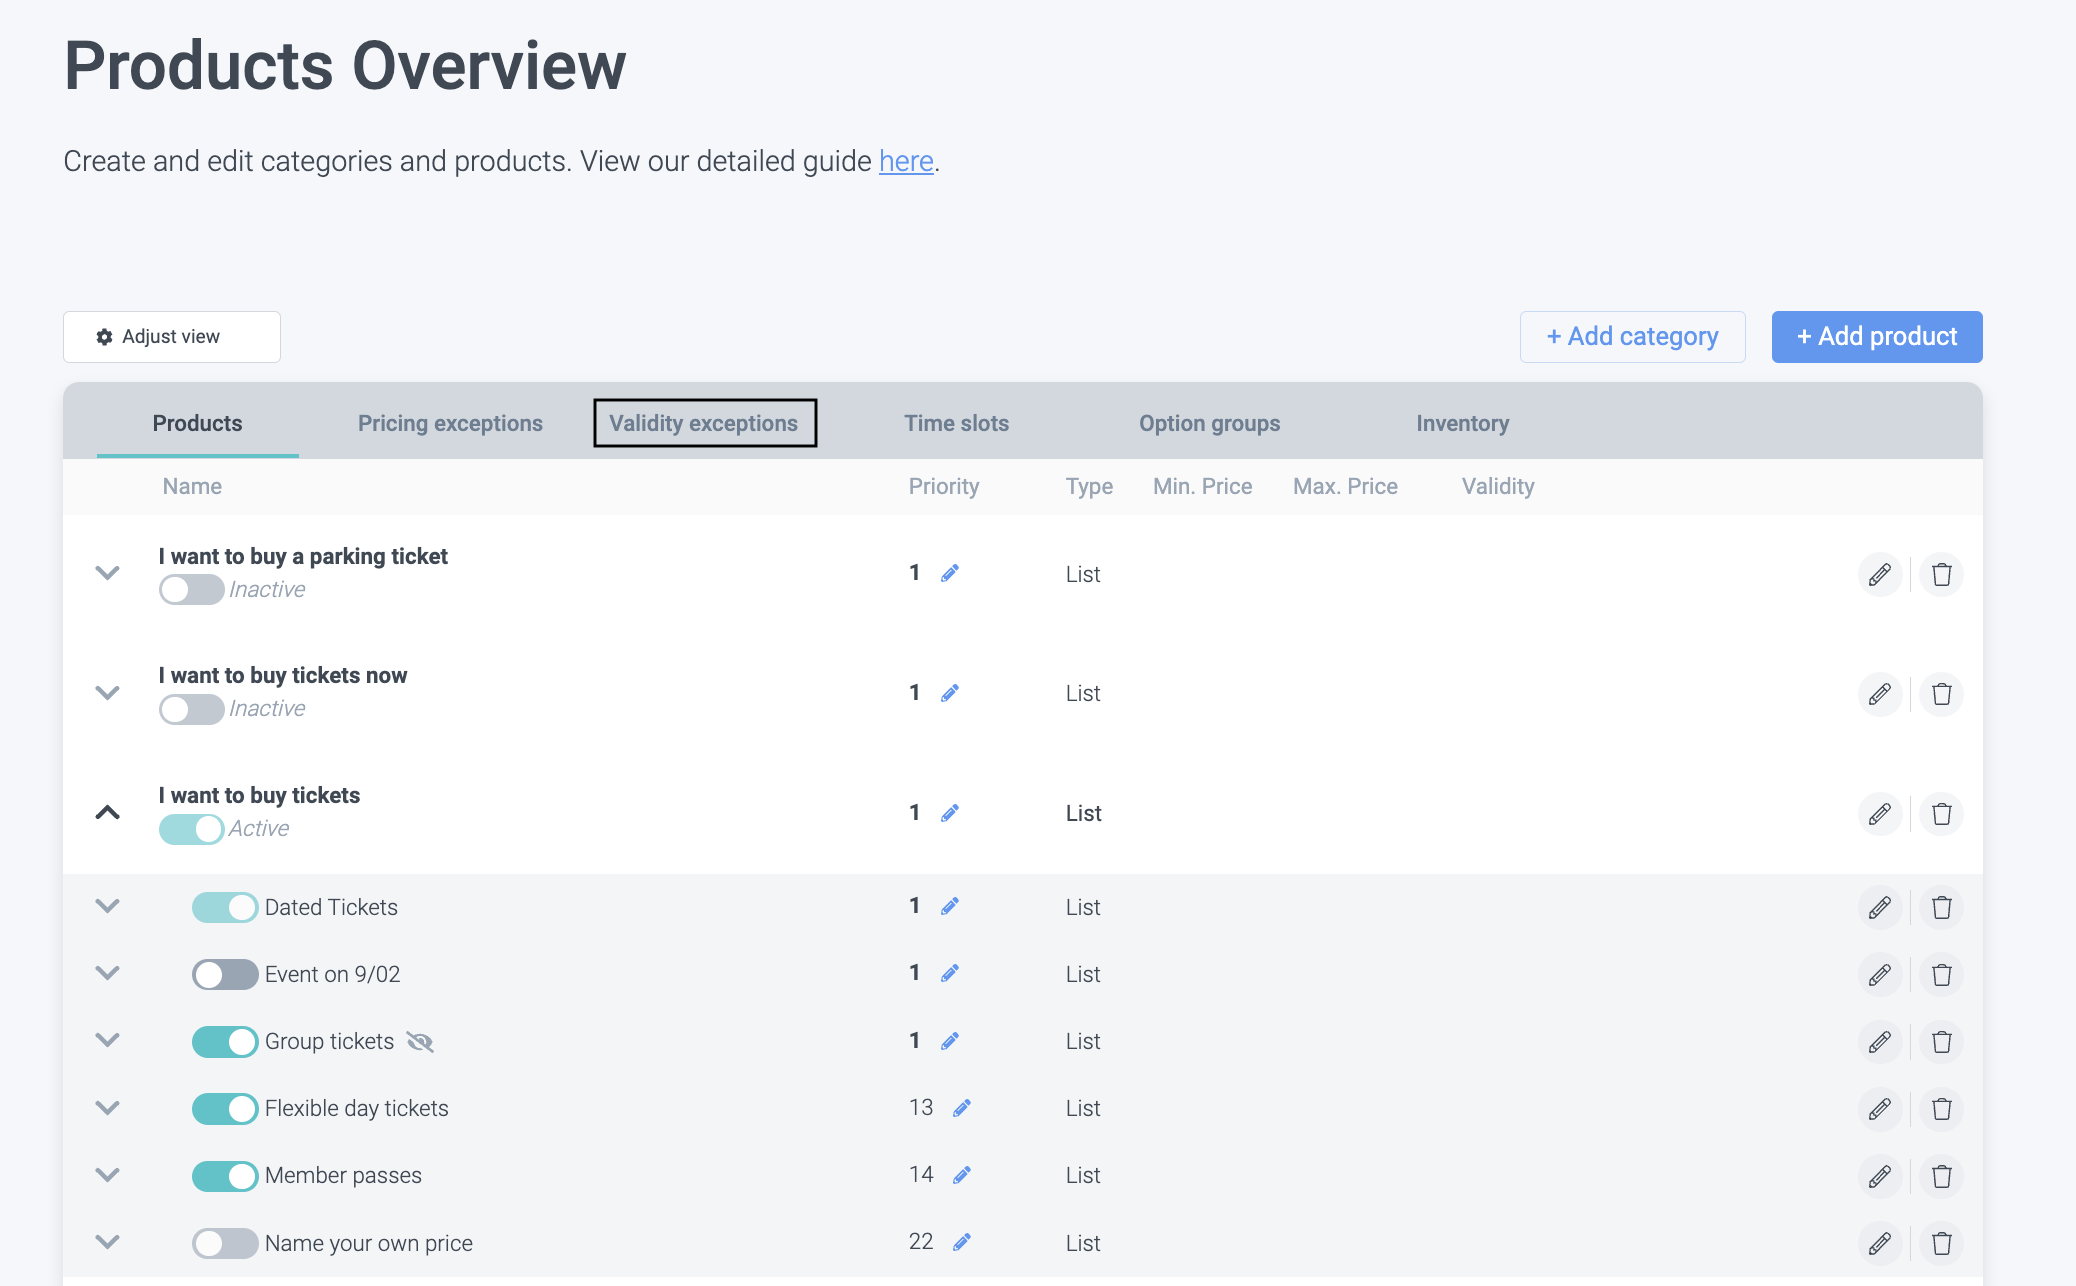
Log into your Control Panel and in the left-side menu, go to Products. It will take you to a screen that looks pretty much like this where you will be able to see your own list of products:
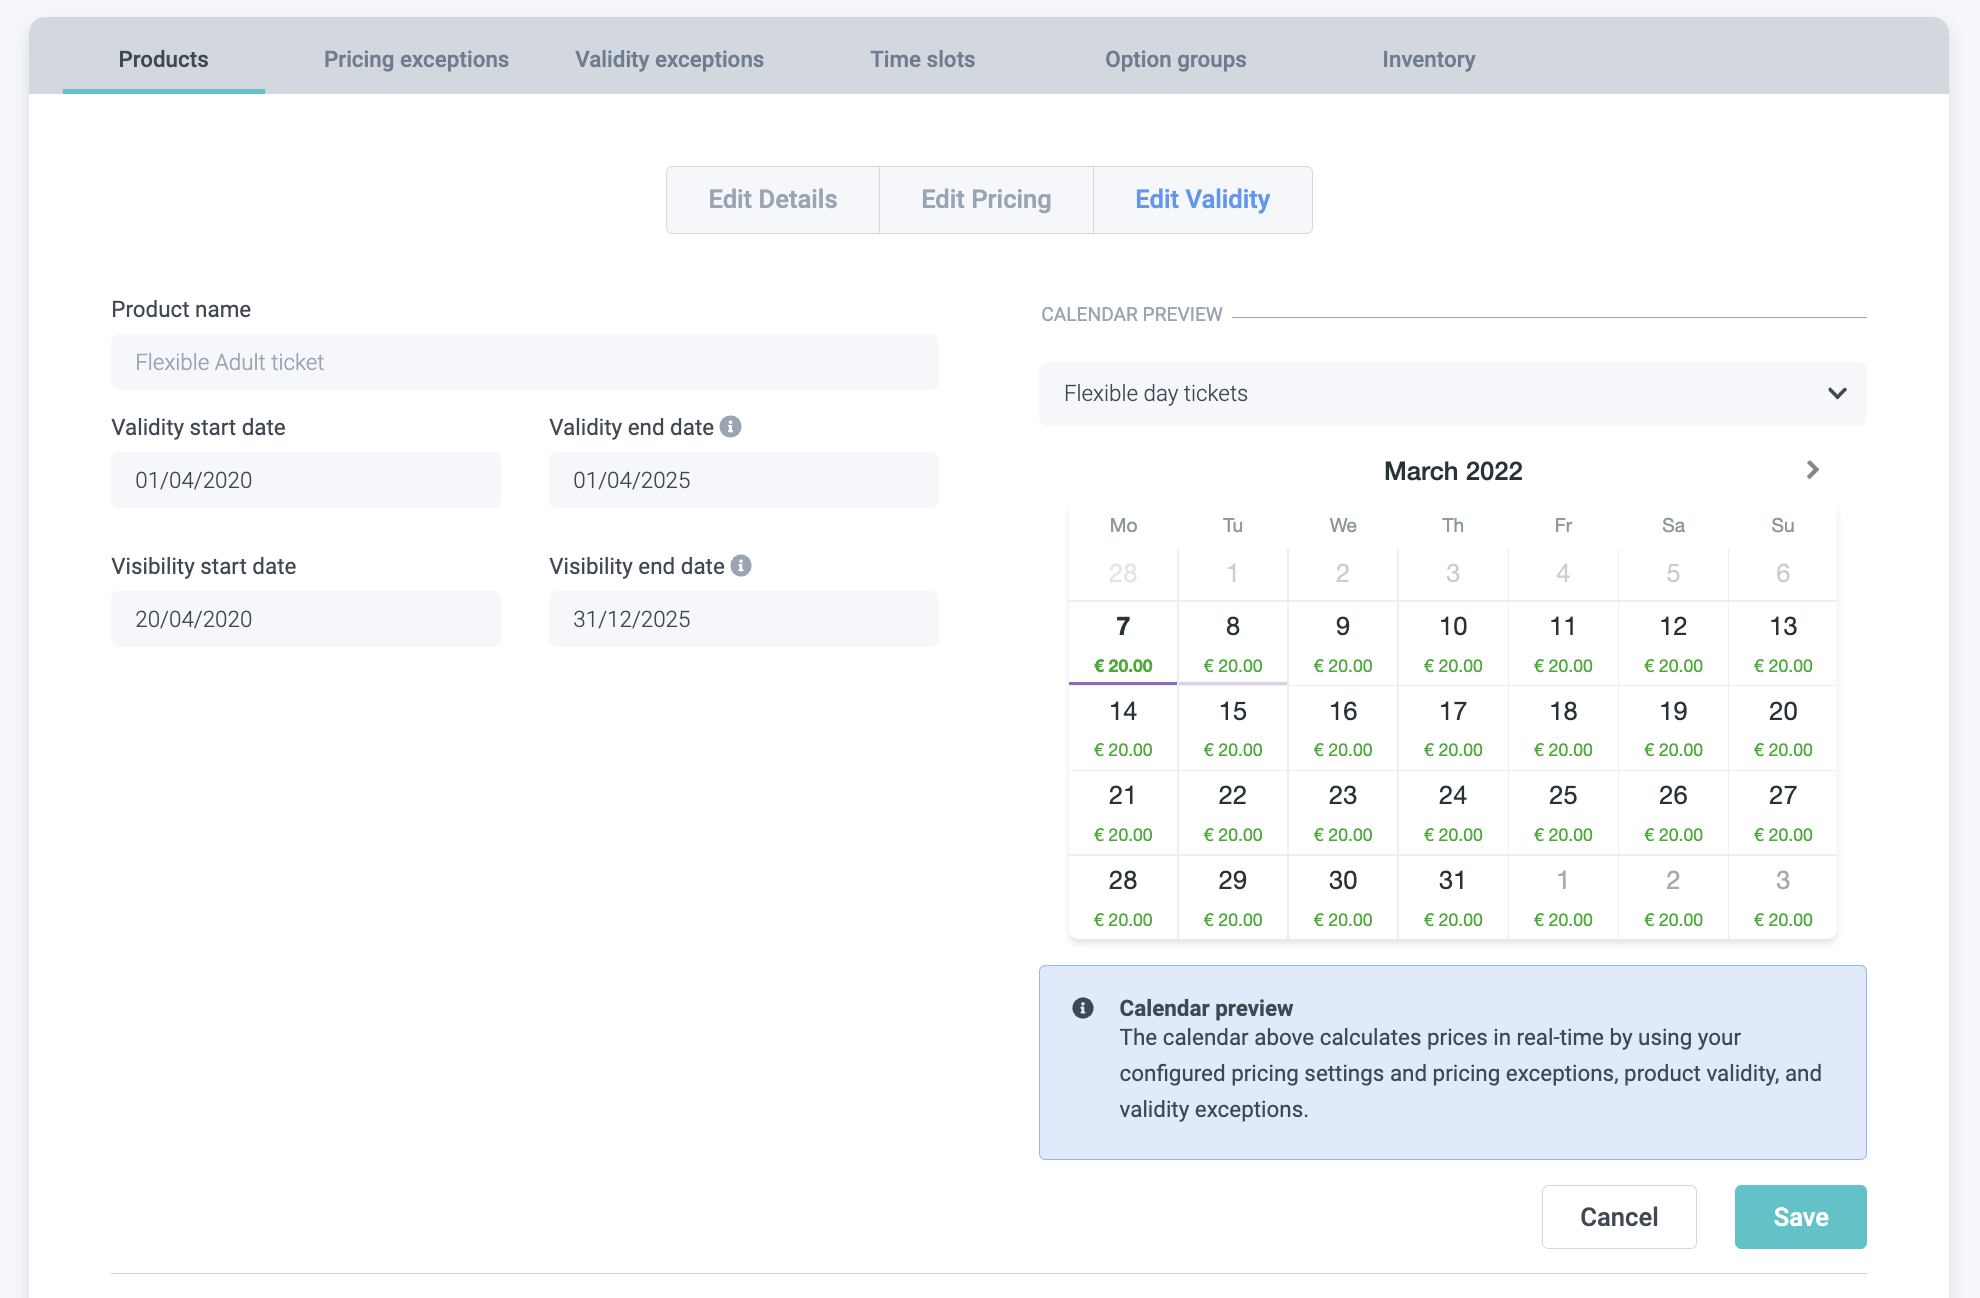
If you want to edit a specific product validity, click on the product in your products page and click on Edit Validity at the top of the product edit page.
On the top, you will see the title, with the name of the article you are editing the validity for.
And by 'validity' we are referring to when the visitor will actually be visiting the venue and redeeming their ticket. So what you are setting up here is the dates that the booker will be able to select on the calendar to visit your venue and enjoy that certain product.
- Validity start date indicates from which day onwards this product will be valid.
- Validity end date indicates (surprise!) up until which date that product will be valid.
To introduce your own dates, simply click on the fields, and a small calendar will appear from which you can select your validity start and end date.
- Visibility start & date indicates the timeframe your product will be visible in the ticket shop (end-date is included). As a standard validity on all articles maximum validity is not more than 3 years. So keep in mind before this period ends, to always update your validity!!!
IMPORTANT NOTE: Don't include your undated tickets in validity exceptions!!! This will keep them from selling on certain dates and you should always want to sell undated tickets.
As usual, once you introduce your own dates, don't forget to hit the SAVE button to save your changes.
In the example shown, the Adult ticket is valid from the 4th of April (2020) until the 4th of April (2025). The white box below that shows "No results" is indicating that there haven't been any validity exceptions added yet to this article, and that therefore, it is available for the buyers to select in any of the days in between that time-frame period.
However, it doesn't seem very realistic that a product would be available and open to the public for 5 years straight, does it? There will probably be dates (perhaps even months depending on the seasonality of the product) when the venue will be closed or the product won't be available. Hence, you will have to indicate in your validity settings those date exceptions for which the product should not be available.
3. Managing Validity Exceptions
You can add validity exceptions in two different ways:
-
By clicking on the Add exception button on the bottom right of your Validity settings screen.
-
By clicking on the Validity exceptions tab on your Product overview screen.
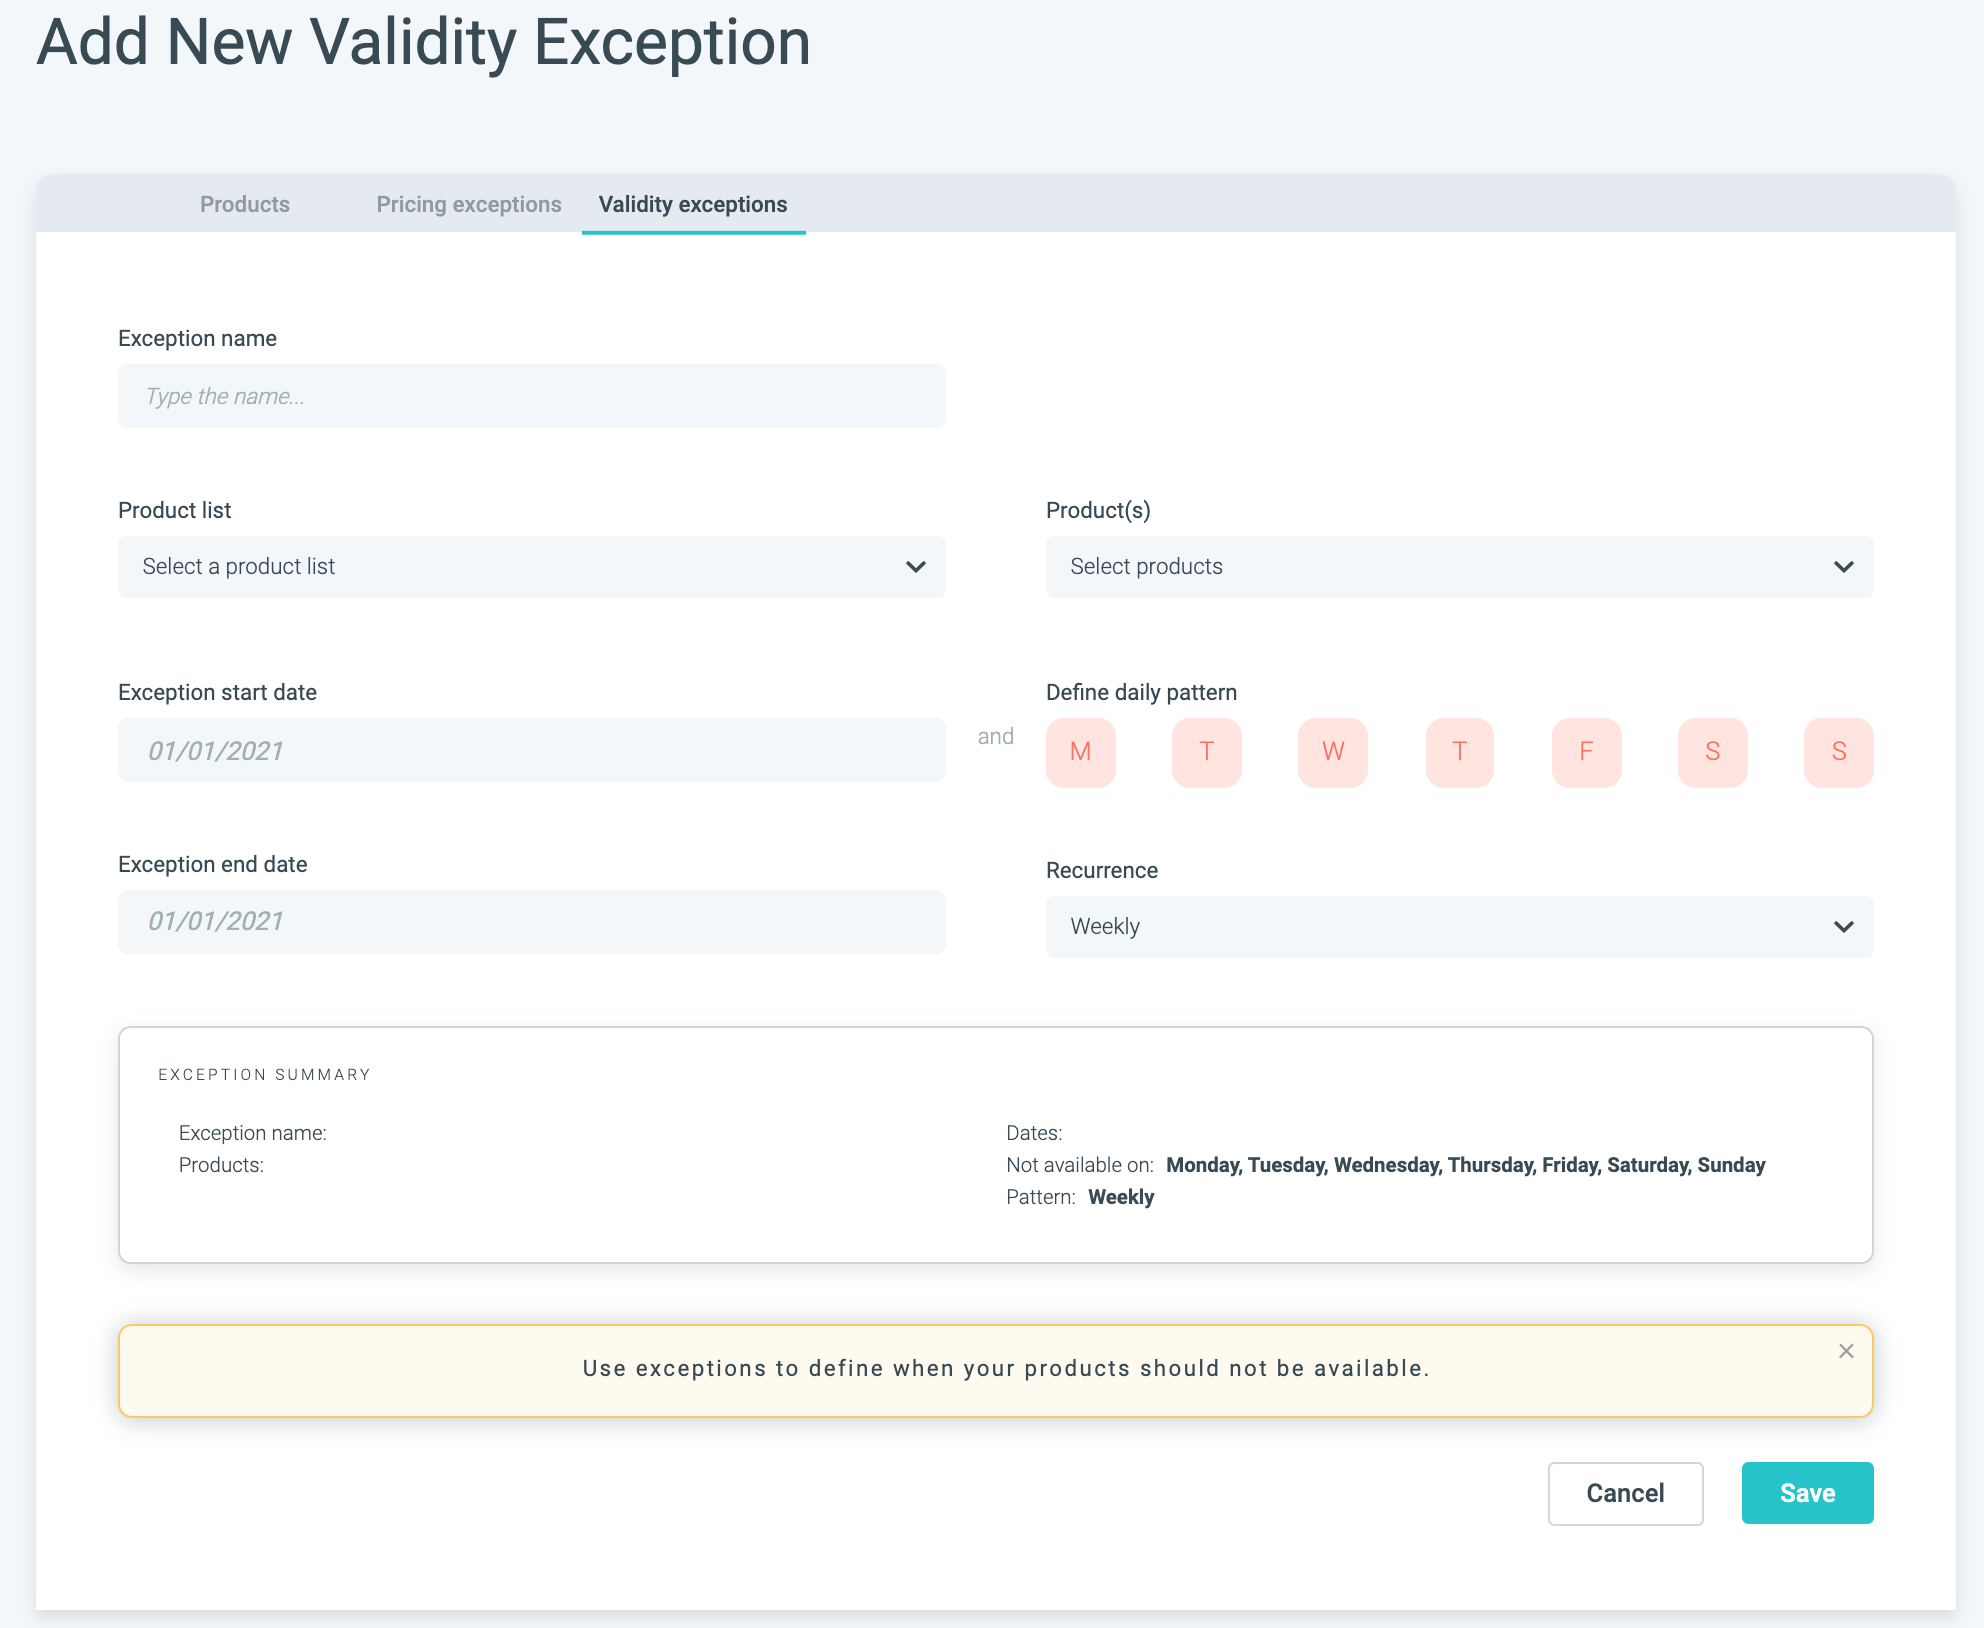
Both will take you to the same place: In this screen, you can add and edit validity exceptions, which will override your general validity settings for each of your products.
1. Exception name: We suggest to give your exception a descriptive name that will help you identify/remember which validity rule you've set just by reading the title.
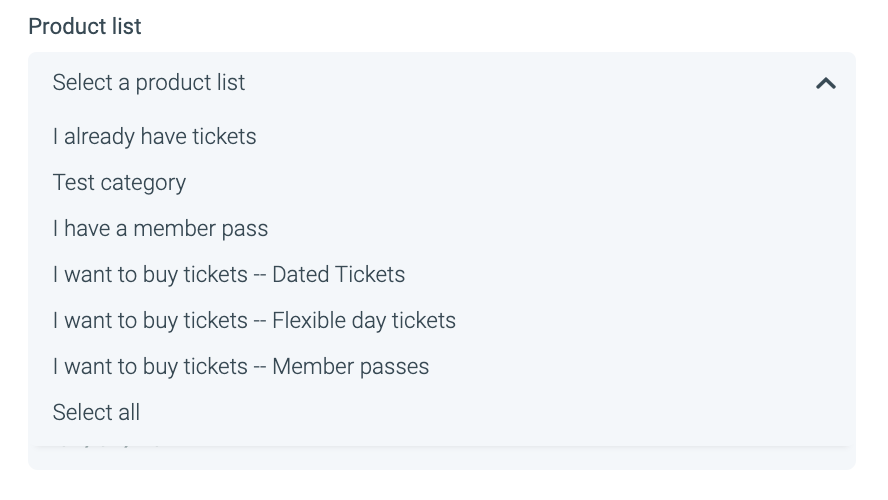
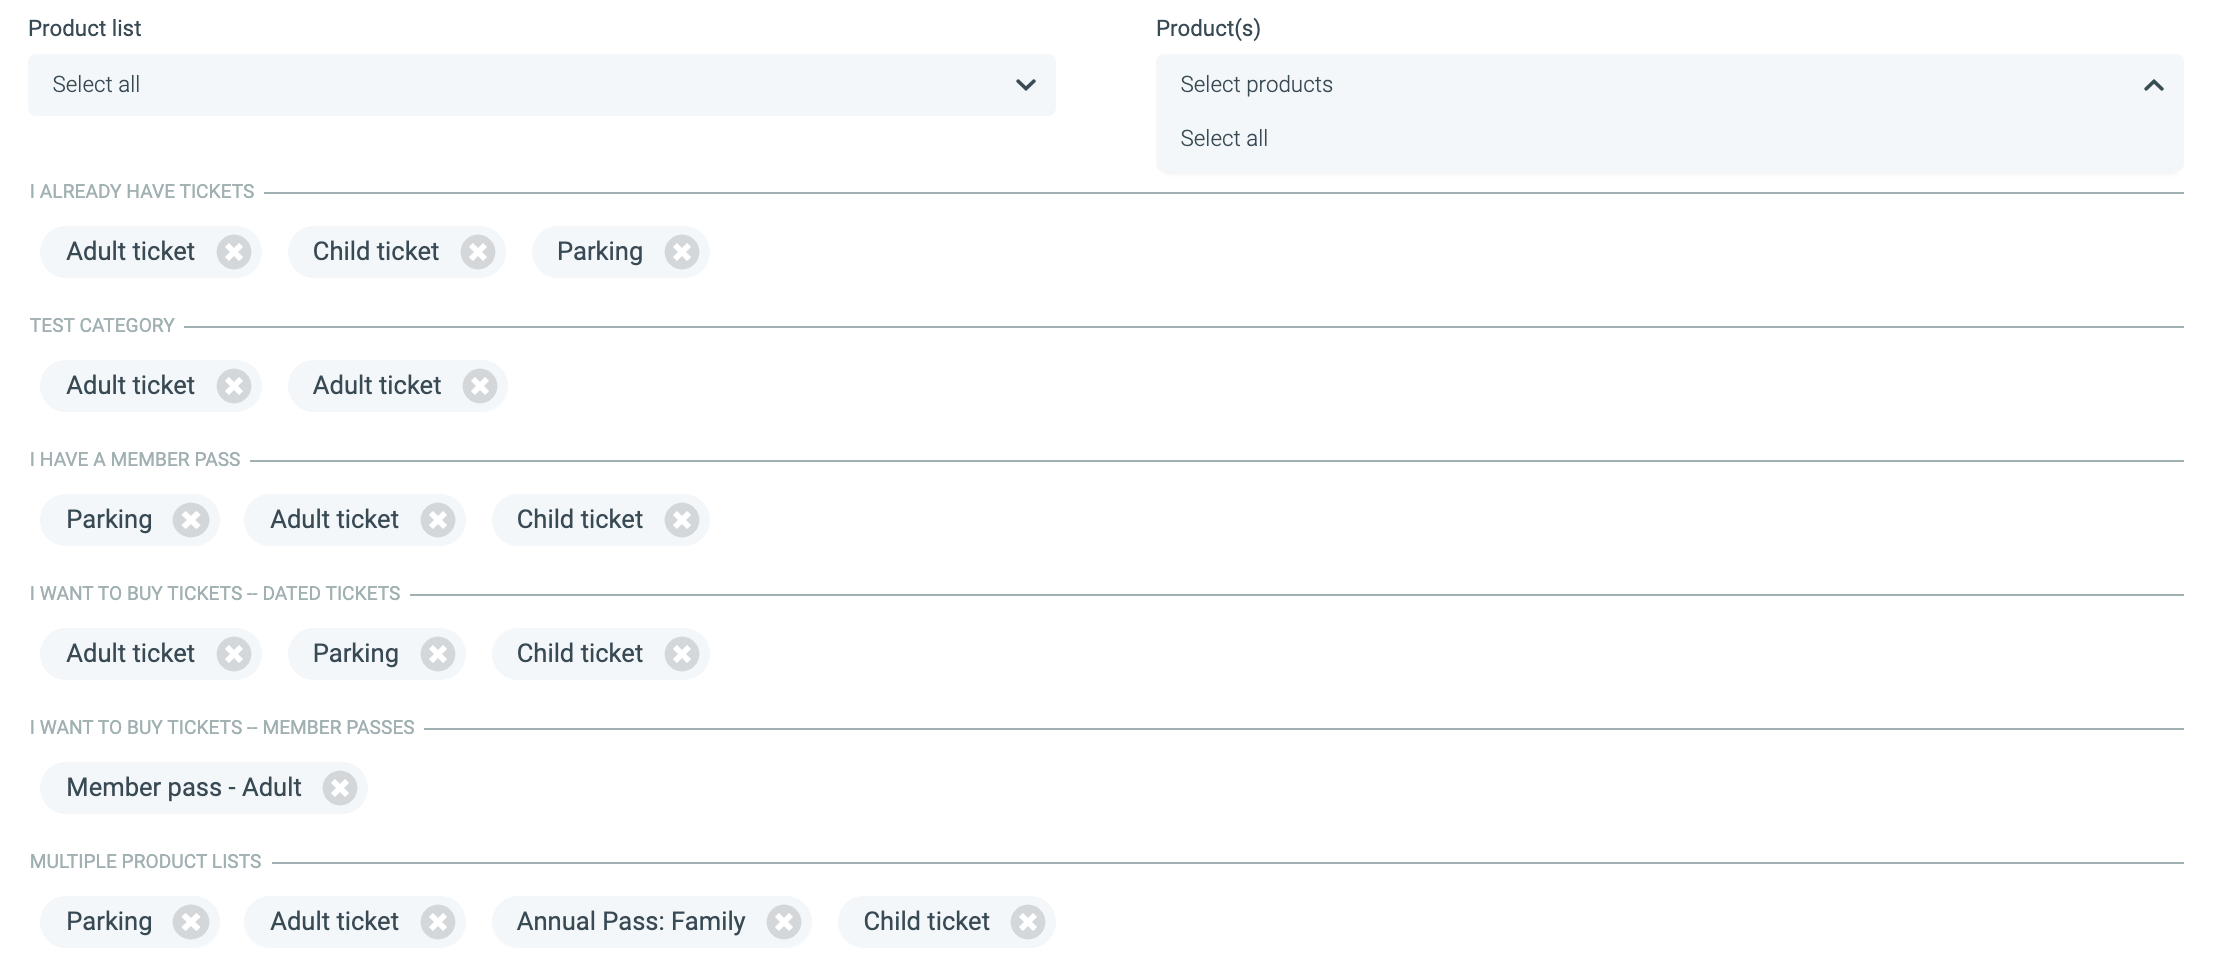
2. Product list: When clicking on this field a menu will unfold with your different product lists (categories/groups for your articles). Select the one for which you want to apply the validity exception or select all (if you want the rule to apply to all categories).
3. Products: From the product list you have selected, you might want your validity exception rule to apply to just one or a few specific products, or to all of them. By clicking on this field you can choose exactly which articles you want this rule to apply to. You can also simply remove articles from the exception by clicking on the (x) next to them.
4. Exception start and end date: Define the time-frame period for which you want your selected products not to be available.
E.g: Let's say your venue closes from Monday to Friday every week on December and only allows visitors on the weekends. Then you would select the 1st of December as your Exception start date and 31st of December as your Exception end date. Lastly, you would set the recurrence to weekly because the validity exception repeats itself week after week, and then you would deselect Saturday and Sunday by clicking on them to turn them green and exclude them from this validity rule.
- Red color: closed (affected by validity exception)
- Green color: open (not affected by validity exception)
Once you have entered the dates and settings you will be able to see your validity exception's summary in the Exception Summary box, which will give you a more clear overview of what you have just set up.
If everything looks okay, simply hit the SAVE button, and there you have it, your first validity exception is now live!
And remember, you can always check all the validity exception rules that you have created on the Validity Exception overview tab (under the "Products" section):
4. Validity Exceptions - Pay attention!
Only use Validity Exceptions when you want to create a validity exception for one specific product. If you want to have an exception for one day or a longer timeframe for all products, please do this via the opening times.
5. Time to practice
Let’s put all this knowledge into practice!
1. Change the validity of one of your products to specific days. Make sure not to save it so it doesn't affect the products displayed on your ticket shop.
2. Create an exception to one of your products. Make the product unavailable on weekdays in the month of January.
6. Check yourself
- Do you know what validity means?
- Do you know how to manage the validity of a product?
- Do you know how to create a validity exception?
If you answered “yes”, congratulations! You are on your way towards mastering your Convious Control Panel


