
With your own channel on Tap from Convious you not only give your visitors the chance to have their eTickets and Season passes always at hand, ready to scan - make your life and theirs easier - you also can send them push notifications, let them buy new tickets or place new reservations with a few clicks right there from the app but you can also present relevant content to them via your Placements.
Such content may include:
- Food & Beverage offers such as menus or opening times of your on-site restaurants
- Your opening times
- Directions to your venue - how about google maps directions?
- Your FAQ page
- Information on the attractions of your venue
- Your souvenir shop
- Direct access to the purchase of parking tickets
- Promote special offers and events
- AND MUCH MORE! The choice and freedom is yours: get to know your customers and bring the right content at the right moment right into their hands - with Placements!
To give you full control and flexibility over the content you want your visitors to engage with or should be informed about, you can create, edit and arrange your Placements via the Convious Control Panel.
How to create a new Placement
1. Navigate to Engage tools within the main menu to your left.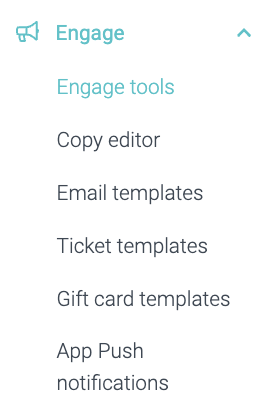

Now, in case you or a team member of yours has created a placement before, you will see them here on the App Placements page.

If you want to edit an existing Placement, you can click on Action on the right-hand side of each placement. There you can enter the Convious Studio to edit the Placement.
2. To create a new Placement choose Add new.
Now you will enter the Convious Studio.
Creating a new placement consists of 4 parts: Type, Action, Scheduling and Targeting.
3. First, you will have to define the Type of the placement. This includes:

-
-
3.2 Type of Placement: You can choose between a wide placement and a small placement. A wide placement allows you to add an image; a small placement doesn't.
To show them to you in direct comparison:Don't worry if you do not see this in your preview just yet. You will see the design changes as soon as you add the title and subtitle.
- 3.3 Background colour: In the drop-down menu, you can choose between dark and light and your brands' colours. Notice that the background of your channel will be in your brands' main color scheme as well.
- 3.4 Upload image: If you chose the wide placement type, click on browse to select an image from your computer or drag and drop an image.
- 3.5 Title: Now it is time to set the title that will be displayed to your customers.
- 3.6 Subtitle: An additional and optional opportunity to add an inviting text to the Placement.
⚠️ For title and subtitle: Make sure to click through the languages to add the title per language available in your Checkout.
?PRO TIP: Add emojis to make it more playful and attention-grabbing! -


4. Hit Next to move to the next part of creating your Placement: Action.
5. Here, you will have to connect the Placement to the destination your customer should be sent to when clicking. This can be one of your website pages or a deep link to a special offer in your Checkout. This deep link will automatically open a certain category within your Checkout, showing the products within.
In case you do not know how to get a deep link:
5.1 Go to your products page.
5.2 Choose the category the offer is connected to.
5.3 Copy the deep link provided to you
5.4 Paste the link into the Placement.
6. Hit Next to move to the next part of creating your placement: Scheduling.
We know much content is planned, but some content might be ready to go as you enter it into your Placement.

- 6.1 That is why as a Start Date, you can either select it to go live Now, which means as soon as you hit Publish your placement will be visible to your customers or choose Date and schedule when the placement should go live by setting a date and time.

- 6.2 End Date: If your placement is rather timeless content, such as the link to your Frequently Answered Questions or Directions or content that has no set expiration date to its relevancy, then you have the option to have it displayed until you choose to manually unpublish it by choosing Never.
If it is a promotion to an offer for a certain time frame, choose Date to set the date and time when the placement should automatically unpublished itself. - 6.3 Active: Set your Placement on Active to have it go live when you hit Publish. If it is set on inactive, it won't be visible on your channel. This is handy in case you want to unpublish a Placement temporarily but not delete it forever.

7. As your last step, you have the opportunity to set your target audience for this placement.
This is very useful when you want to promote loyalty offers to your season pass holders, season passes to those who placed two purchases in the past four months or when you communicate a special event for certain days only to those who come to visit you on those.
Selecting an audience will ensure the placement is only shown to this group and no one else.

Above you see the example of promoting a season pass only to those who have already visited you twice within the past 4 months.
Now have to ask yourself: Is this message a marketing message or service-related?
Why? Because you can't just use your customers' information for marketing purposes without their consent. But you can target them if the purpose behind your message is merely related to the service you offer.
Service: The communication of new COVID measures or that parking is not possible on parking lot 1 today is considered vital to the service you deliver and, thus, a service message.
Marketing: Targeting your customers to offer parking tickets or upsell a special meal deal is considered marketing.
If your message is a service message, you can disregard the marketing cookie checkbox below the audience selection.
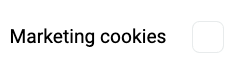
If your message is a marketing message, you need to tick the cookie checkbox below the audience selection because this defines that this engage tool version will only be shown to those who consented to having their data used to personalise their experience on your website.

Obviously, the example above is a marketing message. Therefore, we tick the box.
8. Hit Publish to go live!


Notice: If you set your start date to now, it will show immediately after refreshing the app. If you set the date later in time, it won't show just yet. You will see the status of your Placement on the app placement overview page.

If a placement is scheduled for a later day, it will look like this:

How to arrange the Placements
Now that you have created a new placement, you might want to put it at the top of your channel to ensure maximum exposure. Or you just want to rearrange your current placements to highlight certain information. Here is how easy this is:
1. Go to your App Placement page where you see the overview of all placements.
2. Click on Edit - the one above all placements and next to Add placement.

You will see arrows appearing at the side of the name of each Placement.
3. Click on the arrows to move the Placements up or done.
In terms of hierarchy: the highest Placement will be the first to display on your channel, and the lowest will be the last.
If we move the easter special to the top, it will show right below your permanent offers:


DONE!